| This is a guest post by Rafal Myslek from Atlassian. |
According to a recent survey we conducted, software & IT teams on average use 4+ tools to move code from development to customer-facing production. As a result, teams struggle with keeping the status of work updated and understanding the overall health of their delivery pipeline.
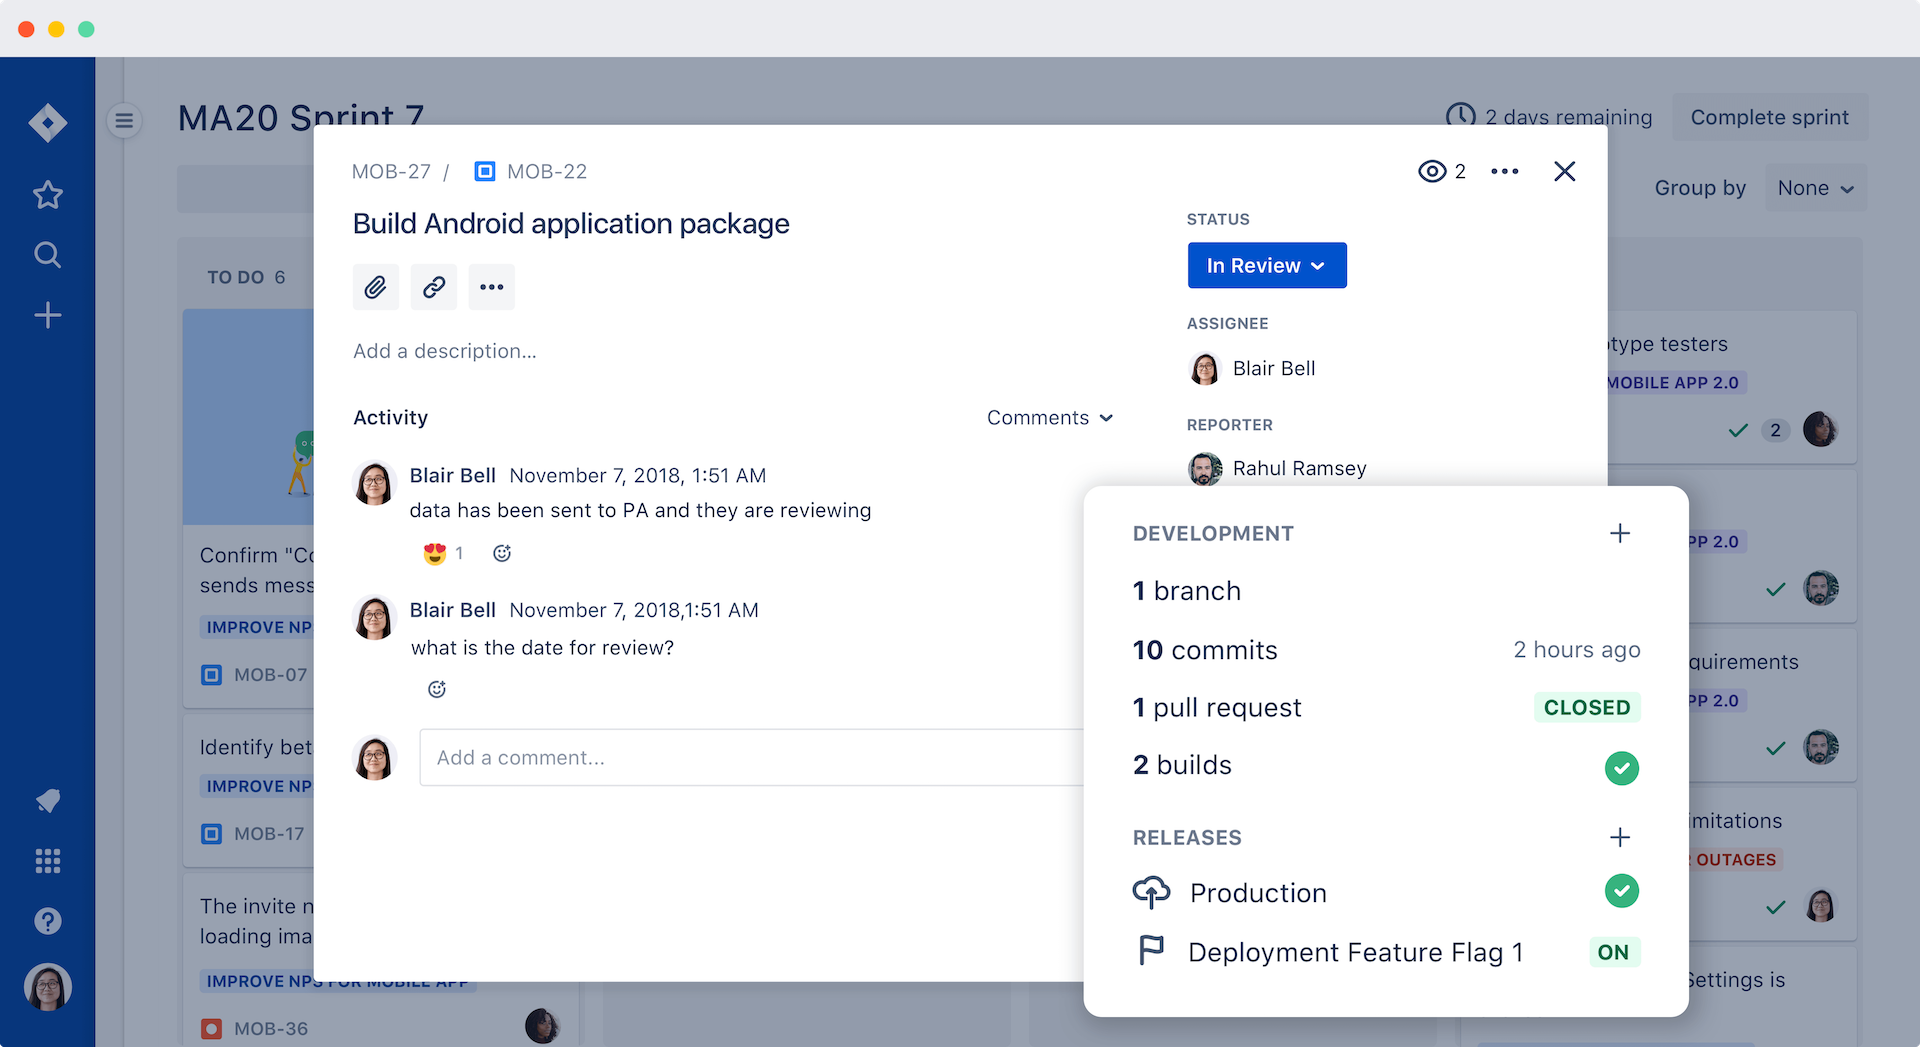
To solve this problem, I am excited to announce that we built an official Jenkins plugin for Jira Software Cloud. The plugin automatically associates build and deployment information from Jenkins with relevant Jira issues and exposes key information about your pipeline across Jira issues, boards and via JQL. This means you can use Jira Software to automatically update and track issues through your complete development pipeline, from backlog to release.
I hope this plugin adds value to you and your team. If you are interested in contributing or forking this plug-in you can head over to our project on the Jenkins GitHub repo to get started.
Better collaboration between teams

This new information view is so powerful because historically it was dispersed across multiple tools only accessible to a few members of your team. Now anyone involved in the software delivery process can self-serve this information. For example, product managers, QA, and support teams can view which features have been deployed to customers and which are still waiting in staging environments.
With better information sharing between tools in your delivery stack, you can also improve cross-collaboration between teams. Teams such as QA and operations can collaborate in the software teams next sprint. For example, you can use build information in Jira Software to create a workflow between QA and developers and create a rapid feedback loop for testing at any point in your development process.
Use Jira’s Querying Language for advanced views

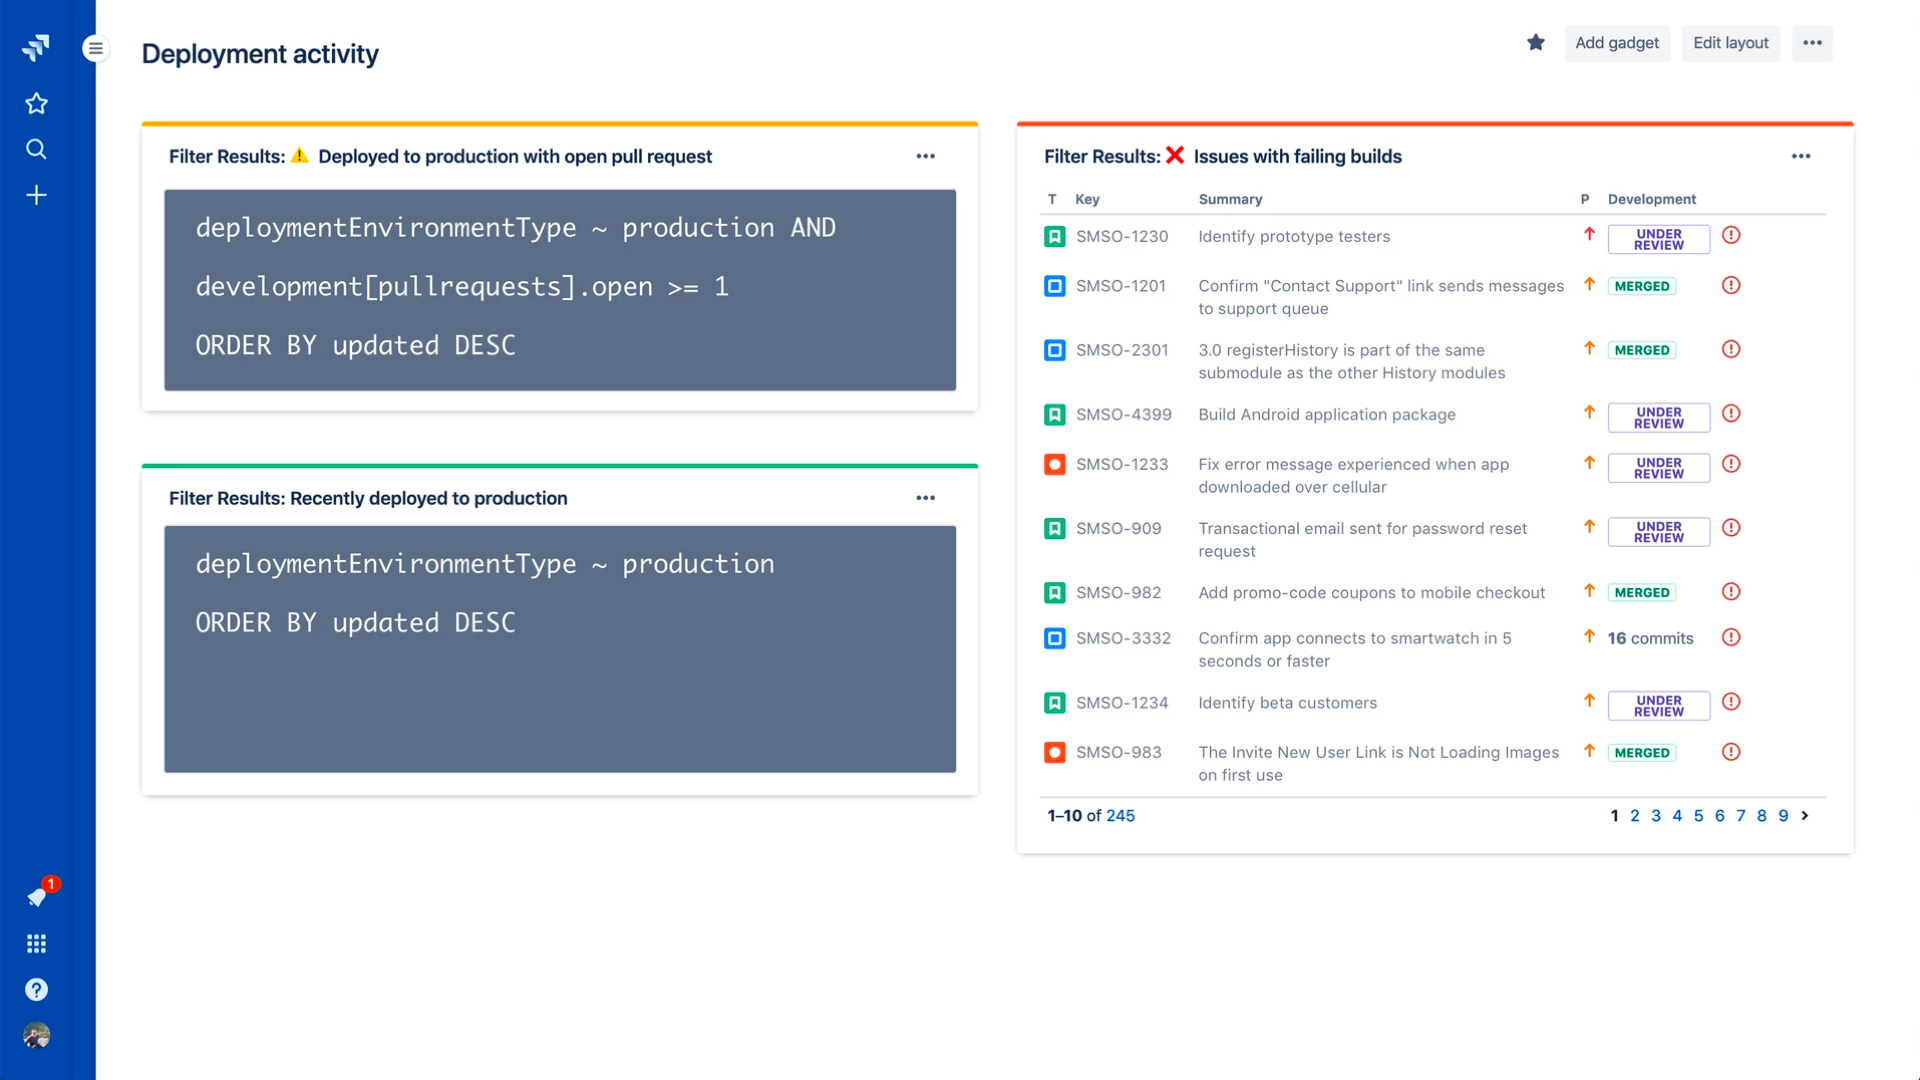
In addition to building better ways to collaborate, these integrations also give your team deeper insight into the development pipeline from within Jira Software. You can now create powerful views into your delivery pipeline with JQL queries across multiple connected tools. For example, you can write a custom JQL query to report all Jira issues that have been deployed to production but still have an open PR.
deploymentEnvironmentType ~ “production“ AND development[pullrequests].openGet started
In Jira Software Cloud
Create OAuth credentials in Jira for Jenkins
Navigate to Jira home > Jira settings > Apps.
Select OAuth credentials.
Select Create credentials.
Enter the following details:
App name - Jenkins
App logo - A URL to the Jenkins logo, which will be used as an icon in the list of credentials. Eg: https://jenkins.yourcompany.com/logo.png
Server base URL - The URL to your Jenkins server. Eg: https://jenkins.yourcompany.com
In Jenkins
Install the Jenkins plugin
Login to your Jenkins server and navigate to the Plugin Manager.
Select the 'Available' tab and search for 'Atlassian Jira Software Cloud' as the plugin name then install it.
The open-source plugin is hosted in the Jenkins GitHub account. You can check it out here.
Set up Jenkins credentials
In Jenkins, go to Manage Jenkins > Configure System screen and scroll to the Jira Software Cloud integration section.
Select Add Jira Cloud Site > Jira Cloud Site. The Site name, ClientID, and Secret fields display.
Enter the following details:
Site name: The URL for your Jira Cloud site, for example yourcompany.atlassian.net.
Client ID: Copy from OAuth credentials screen (Client ID column).
Secret: Select Add > Jenkins.
For Kind, select Secret text.
For Secret, copy from OAuth credentials screen (Secret column).
For Description, provide a helpful description
Select Test settings to make sure your credentials are valid for your Jira site.
How to use the plugin
To start using the integration:
Go into a specific pipeline in Jenkins ( Note: Your pipeline must be a 'Multibranch Pipeline' ).
From the left-hand menu, select Pipeline Syntax.
In the Snippet Generator, select jiraSendDeploymentInfo or jiraSendBuildInfo from the dropdown list of Sample Steps and fill in the relevant details.
Select Generate Pipeline Script and copy/paste the output into your Jenkinsfile on the relevant Repository you are using. This will be used to notify Jira when you run that pipeline on that repo.
For sending build information
This is an example snippet of a very simple ‘build’ stage set up in a Jenkinsfile. After the pipeline is run, it will post the build information to your Jira Cloud site by looking at the branch name. If there is a Jira issue key (e.g. “TEST-123”) in the branch name, it will send the data over to Jira.
Jenkinsfile example
pipeline {
     agent any
     stages {
         stage('Build') {
             steps {
                 echo 'Building...'
             }
             post {
                 always {
                     jiraSendBuildInfo site: 'example.atlassian.net'
                 }
             }
         }
     }
 }
For sending deployment information
This is an example snippet of two stages that run on any change to the staging or master branch. Again, we use a post step to send deployment data to Jira and the relevant issues. Here, the environmentId, environmentName, and environmentType need to be set to whatever you want to appear in Jira.
Jenkinsfile example
pipeline {
     agent any
     stages {
         stage('Deploy - Staging') {
             when {
                 branch 'master'
             }
             steps {
                 echo 'Deploying to Staging from master...'
             }
             post {
                 always {
                     jiraSendDeploymentInfo site: 'example.atlassian.net', environmentId: 'us-stg-1', environmentName: 'us-stg-1', environmentType: 'staging'
                 }
             }
         }
         stage('Deploy - Production') {
            when {
                branch 'master'
            }
            steps {
                echo 'Deploying to Production from master...'
            }
            post {
                always {
                    jiraSendDeploymentInfo site: 'example.atlassian.net', environmentId: 'us-prod-1', environmentName: 'us-prod-1', environmentType: 'production'
                }
            }
         }
     }
 }
The entire Jenkinsfile may look something like this. This is only meant to represent an example of what the Jira snippets could look like within a stage or step.
Jenkinsfile example
pipeline {
     agent any
     stages {
         stage('Build') {
             steps {
                 echo 'Building...'
             }
             post {
                 always {
                     jiraSendBuildInfo site: 'example.atlassian.net'
                 }
             }
         }
         stage('Deploy - Staging') {
             when {
                 branch 'master'
             }
             steps {
                 echo 'Deploying to Staging from master...'
             }
             post {
                 always {
                     jiraSendDeploymentInfo site: 'example.atlassian.net', environmentId: 'us-stg-1', environmentName: 'us-stg-1', environmentType: 'staging'
                 }
             }
         }
         stage('Deploy - Production') {
            when {
                branch 'master'
            }
            steps {
                echo 'Deploying to Production from master...'
            }
            post {
                always {
                    jiraSendDeploymentInfo site: 'example.atlassian.net', environmentId: 'us-prod-1', environmentName: 'us-prod-1', environmentType: 'production'
                }
            }
         }
     }
 }
Questions or feedback?
If you have any questions, please contact Atlassian support and they will route it to the correct team to help you.