Quantcast
Channel: Jenkins Blog
Viewing all 1087 articles
Browse latest View live

Matrix building in scripted pipeline

$
0
0

With the recent announcement about matrix building you can performMatrix builds with declarative pipeline. However, if you must use scripted pipeline, then I’m going to cover how to matrix build platforms and tools using scripted pipeline. The examples in this post are modeled after the declarative pipeline matrix examples.

Matrix building with scripted pipeline

The following Jenkins scripted pipeline will build combinations across two matrix axes. However, adding more axes to the matrix is just as easy as adding another entry to the Map matrix_axes.

Jenkinsfile
// you can add more axes and this will still workMap matrix_axes = [PLATFORM: ['linux', 'windows', 'mac'],BROWSER: ['firefox', 'chrome', 'safari', 'edge']
]@NonCPSList getMatrixAxes(Map matrix_axes) {List axes = []
    matrix_axes.each { axis, values ->List axisList = []
        values.each { value ->
            axisList << [(axis): value]
        }
        axes << axisList
    }// calculate cartesian product
    axes.combinations()*.sum()
}// filter the matrix axes since// Safari is not available on Linux and// Edge is only available on WindowsList axes = getMatrixAxes(matrix_axes).findAll { axis ->
    !(axis['BROWSER'] == 'safari'&& axis['PLATFORM'] == 'linux') &&
    !(axis['BROWSER'] == 'edge'&& axis['PLATFORM'] != 'windows')
}// parallel task mapMap tasks = [failFast: false]for(int i = 0; i < axes.size(); i++) {// convert the Axis into valid values for withEnv stepMap axis = axes[i]List axisEnv = axis.collect { k, v ->"${k}=${v}"
    }// let's say you have diverse agents among Windows, Mac and Linux all of// which have proper labels for their platform and what browsers are// available on those agents.String nodeLabel = "os:${axis['PLATFORM']}&& browser:${axis['BROWSER']}"
    tasks[axisEnv.join(', ')] = { ->
        node(nodeLabel) {
            withEnv(axisEnv) {
                stage("Build") {
                    echo nodeLabel
                    sh 'echo Do Build for ${PLATFORM} - ${BROWSER}'
                }
                stage("Test") {
                    echo nodeLabel
                    sh 'echo Do Build for ${PLATFORM} - ${BROWSER}'
                }
            }
        }
    }
}

stage("Matrix builds") {
    parallel(tasks)
}

Matrix axes contain the following combinations:

[PLATFORM=linux, BROWSER=firefox]
[PLATFORM=windows, BROWSER=firefox]
[PLATFORM=mac, BROWSER=firefox]
[PLATFORM=linux, BROWSER=chrome]
[PLATFORM=windows, BROWSER=chrome]
[PLATFORM=mac, BROWSER=chrome]
[PLATFORM=windows, BROWSER=safari]
[PLATFORM=mac, BROWSER=safari]
[PLATFORM=windows, BROWSER=edge]

It is worth noting that Jenkins agent labels can contain a colon (:). Soos:linux and browser:firefox are both valid agent labels. The node expression os:linux && browser:firefox will search for Jenkins agents which have both labels.

Screenshot of matrix pipeline

The following is a screenshot of the pipeline code above running in a sandbox Jenkins environment.

Screenshot of matrix pipeline

Adding static choices

It is useful for users to be able to customize building matrices when a build is triggered. Adding static choices requires only a few changes to the above script. Static choices as in we hard code the question and matrix filters.

Jenkinsfile
Map response = [:]
stage("Choose combinations") {
    response = input(id: 'Platform',message: 'Customize your matrix build.',parameters: [
            choice(choices: ['all', 'linux', 'mac', 'windows'],description: 'Choose a single platform or all platforms to run tests.',name: 'PLATFORM'),
            choice(choices: ['all', 'chrome', 'edge', 'firefox', 'safari'],description: 'Choose a single browser or all browsers to run tests.',name: 'BROWSER')
        ])
}// filter the matrix axes since// Safari is not available on Linux and// Edge is only available on WindowsList axes = getMatrixAxes(matrix_axes).findAll { axis ->
    (response['PLATFORM'] == 'all' || response['PLATFORM'] == axis['PLATFORM']) &&
    (response['BROWSER'] == 'all' || response['BROWSER'] == axis['BROWSER']) &&
    !(axis['BROWSER'] == 'safari'&& axis['PLATFORM'] == 'linux') &&
    !(axis['BROWSER'] == 'edge'&& axis['PLATFORM'] != 'windows')
}

The pipeline code then renders the following choice dialog.

Screenshot of a dialog asking a question to customize matrix build

When a user chooses the customized options, the pipeline reacts to the requested options.

Screenshot of pipeline running requested user customizations

Adding dynamic choices

Dynamic choices means the choice dialog for users to customize the build is generated from the Map matrix_axes rather than being something a pipeline developer hard codes.

For user experience (UX), you’ll want your choices to automatically reflect the matrix axis options you have available. For example, let’s say you want to add a new dimension for Java to the matrix.

// you can add more axes and this will still workMap matrix_axes = [PLATFORM: ['linux', 'windows', 'mac'],JAVA: ['openjdk8', 'openjdk10', 'openjdk11'],BROWSER: ['firefox', 'chrome', 'safari', 'edge']
]

To support dynamic choices, your choice and matrix axis filter needs to be updated to the following.

Map response = [:]
stage("Choose combinations") {
    response = input(id: 'Platform',message: 'Customize your matrix build.',parameters: matrix_axes.collect { key, options ->
            choice(choices: ['all'] + options.sort(),description: "Choose a single ${key.toLowerCase()} or all to run tests.",name: key)
        })
}// filter the matrix axes since// Safari is not available on Linux and// Edge is only available on WindowsList axes = getMatrixAxes(matrix_axes).findAll { axis ->
    response.every { key, choice ->
        choice == 'all' || choice == axis[key]
    } &&
    !(axis['BROWSER'] == 'safari'&& axis['PLATFORM'] == 'linux') &&
    !(axis['BROWSER'] == 'edge'&& axis['PLATFORM'] != 'windows')
}

It will dynamically generate choices based on available matrix axes and will automatically filter if users customize it. Here’s an example dialog and rendered choice when the pipeline executes.

Screenshot of dynamically generated dialog for user to customize choices of matrix build

Screenshot of pipeline running user choices in a matrix

Full pipeline example with dynamic choices

The following script is the full pipeline example which contains dynamic choices.

// you can add more axes and this will still workMap matrix_axes = [PLATFORM: ['linux', 'windows', 'mac'],JAVA: ['openjdk8', 'openjdk10', 'openjdk11'],BROWSER: ['firefox', 'chrome', 'safari', 'edge']
]@NonCPSList getMatrixAxes(Map matrix_axes) {List axes = []
    matrix_axes.each { axis, values ->List axisList = []
        values.each { value ->
            axisList << [(axis): value]
        }
        axes << axisList
    }// calculate cartesian product
    axes.combinations()*.sum()
}Map response = [:]
stage("Choose combinations") {
    response = input(id: 'Platform',message: 'Customize your matrix build.',parameters: matrix_axes.collect { key, options ->
            choice(choices: ['all'] + options.sort(),description: "Choose a single ${key.toLowerCase()} or all to run tests.",name: key)
        })
}// filter the matrix axes since// Safari is not available on Linux and// Edge is only available on WindowsList axes = getMatrixAxes(matrix_axes).findAll { axis ->
    response.every { key, choice ->
        choice == 'all' || choice == axis[key]
    } &&
    !(axis['BROWSER'] == 'safari'&& axis['PLATFORM'] == 'linux') &&
    !(axis['BROWSER'] == 'edge'&& axis['PLATFORM'] != 'windows')
}// parallel task mapMap tasks = [failFast: false]for(int i = 0; i < axes.size(); i++) {// convert the Axis into valid values for withEnv stepMap axis = axes[i]List axisEnv = axis.collect { k, v ->"${k}=${v}"
    }// let's say you have diverse agents among Windows, Mac and Linux all of// which have proper labels for their platform and what browsers are// available on those agents.String nodeLabel = "os:${axis['PLATFORM']}&& browser:${axis['BROWSER']}"
    tasks[axisEnv.join(', ')] = { ->
        node(nodeLabel) {
            withEnv(axisEnv) {
                stage("Build") {
                    echo nodeLabel
                    sh 'echo Do Build for ${PLATFORM} - ${BROWSER}'
                }
                stage("Test") {
                    echo nodeLabel
                    sh 'echo Do Build for ${PLATFORM} - ${BROWSER}'
                }
            }
        }
    }
}

stage("Matrix builds") {
    parallel(tasks)
}

Background: How does it work?

The trick is in axes.combinations()*.sum(). Groovy combinations are a quick and easy way to perform acartesian product.

Here’s a simpler example of how cartesian product works. Take two simple lists and create combinations.

List a = ['a', 'b', 'c']List b = [1, 2, 3]

[a, b].combinations()

The result of [a, b].combinations() is the following.

[
    ['a', 1],
    ['b', 1],
    ['c', 1],
    ['a', 2],
    ['b', 2],
    ['c', 2],
    ['a', 3],
    ['b', 3],
    ['c', 3]
]

Instead of a, b, c and 1, 2, 3 let’s do the same example again but instead using matrix maps.

List java = [[java: 8], [java: 10]]List os = [[os: 'linux'], [os: 'freebsd']]

[java, os].combinations()

The result of [java, os].combinations() is the following.

[
    [ [java:8],  [os:linux]   ],
    [ [java:10], [os:linux]   ],
    [ [java:8],  [os:freebsd] ],
    [ [java:10], [os:freebsd] ]
]

In order for us to easily use this as a single map we must add the maps together to create a single map. For example, adding[java: 8] + [os: 'linux'] will render a single hashmap[java: 8, os: 'linux']. This means we need our list of lists of maps to become a simple list of maps so that we can use them effectively in pipelines.

To accomplish this we make use of theGroovy spread operator (*. in axes.combinations()*.sum()).

Let’s see the same java/os example again but with the spread operator being used.

List java = [[java: 8], [java: 10]]List os = [[os: 'linux'], [os: 'freebsd']]

[java, os].combinations()*.sum()

The result is the following.

[
    [ java: 8,  os: 'linux'],
    [ java: 10, os: 'linux'],
    [ java: 8,  os: 'freebsd'],
    [ java: 10, os: 'freebsd']
]

With the spread operator the end result of a list of maps which we can effectively use as matrix axes. It also allows us to do neat matrix filtering with the findAll {} Groovy List method.

Exposing a shared library pipeline step

The best user experience is to expose the above code as a shared library pipeline step. As an example, I have addedvars/getMatrixAxes.groovy to Jervis. This provides a flexible shared library step which you can copy into your own shared pipeline libraries.

The step becomes easy to use in the following way with a simple one dimension matrix.

Jenkinsfile
Map matrix_axes = [PLATFORM: ['linux', 'windows', 'mac'],
]List axes = getMatrixAxes(matrix_axes)// alternately with a user prompt//List axes = getMatrixAxes(matrix_axes, user_prompt: true)

Here’s a more complex example using a two dimensional matrix with filtering.

Jenkinsfile
Map matrix_axes = [PLATFORM: ['linux', 'windows', 'mac'],BROWSER: ['firefox', 'chrome', 'safari', 'edge']
]List axes = getMatrixAxes(matrix_axes) { Map axis ->
    !(axis['BROWSER'] == 'safari'&& axis['PLATFORM'] == 'linux') &&
    !(axis['BROWSER'] == 'edge'&& axis['PLATFORM'] != 'windows')
}

And again with a three dimensional matrix with filtering and prompting for user input.

Jenkinsfile
Map matrix_axes = [PLATFORM: ['linux', 'windows', 'mac'],JAVA: ['openjdk8', 'openjdk10', 'openjdk11'],BROWSER: ['firefox', 'chrome', 'safari', 'edge']
]List axes = getMatrixAxes(matrix_axes, user_prompt: true) { Map axis ->
    !(axis['BROWSER'] == 'safari'&& axis['PLATFORM'] == 'linux') &&
    !(axis['BROWSER'] == 'edge'&& axis['PLATFORM'] != 'windows')
}

The script approval is not necessary forShared Libraries.

If you don’t want to provide a shared step. In order to expose matrix building to end-users, you must allow the following method approval in the script approval configuration.

Script approval
staticMethod org.codehaus.groovy.runtime.DefaultGroovyMethods combinations java.util.Collection

Summary

We covered how to perform matrix builds using scripted pipeline as well as how to prompt users for customizing the matrix build. Additionally, an example was provided where we exposed getting buildable matrix axes to users as an easy to use Shared Library step via vars/getMatrixAxes.groovy. Using a shared library step is definitely the recommended way for admins to support users rather than trying to whitelist groovy methods.

Jervis shared pipeline library has supported matrix building since 2017 in Jenkins scripted pipelines. (see here andhere for an example).

Introducing the AWS Secrets Manager Credentials Provider for Jenkins

$
0
0

API keys and secrets are difficult to handle safely, and probably something you avoid thinking about. In this post I’ll show how the new AWS Secrets Manager Credentials Provider plugin allows you to marshal your secrets into one place, and use them securely from Jenkins.

When CI/CD pipelines moved to the public cloud, credential management did not evolve with them. If you’re in this situation, you may have seen a number of tactical workarounds to keep Jenkins builds talking to the services they depend on. The workarounds range from bad (hardcoding plaintext secrets into Git) to merely painful (wrangling Hiera EYAML), but their common feature is that they tend to make copies of secrets beyond the reach of automation. This increases their attack surface, makes routine key rotation impractical, and makes remediation difficult after a breach.

The good news is that there is a better way!

AWS Secrets Manager is a comprehensive solution for secure secret storage. You define a secret just once for your whole AWS account, then you give your consumers permission to use the secrets. Secrets Manager lets you manage a secret entry (name and metadata) separately from its value, and it integrates with other AWS services that you already use:

  • Secret entry management: Manual (Web console, AWS CLI) or with an infrastructure management tool (Terraform, CloudFormation etc.)

  • Secret value management: Manual (Web console, AWS CLI) or automatic (secret rotation Lambda function).

  • Access control: AWS IAM policies (for both applications and human operators).

  • Secret encryption: Amazon KMS automatically encrypts the secret value. Use either the account’s default KMS key, or a customer-managed KMS key.

  • Auditing: AWS CloudTrail and CloudWatch Events.

A couple of teams in my company started to use Secrets Manager from Jenkins jobs by calling the AWS CLI, but this remained a niche approach as it was quite unwieldy. There was clearly an appetite to integrate key developer apps with a centralised secrets store, but production-ready integrations were needed for wider adoption. So this year I created the AWS Secrets Manager Credentials Provider plugin for Jenkins, with help from friends in the Jenkins community, to do exactly that.

This is how you set it up…​

  1. Install the plugin from the Jenkins update center.

  2. Give Jenkins read-only access to Secrets Manager with an IAM policy.

  3. (Optional) Configure the plugin, either through the Global Configuration screen or Jenkins Configuration As Code.

This is how you use it…​

  1. Create your build secrets in AWS Secrets Manager. (You can start by uploading secrets via the AWS CLI. More sophisticated methods of secret creation are also available.)

  2. View the credentials in the Jenkins UI, to check that Jenkins can see them.

  3. Bind the credentials by ID in your Jenkins job.

The provider supports the following standard Jenkins credential types:

  • Secret Text

  • Username With Password

  • SSH User Private Key

  • PKCS#12 Certificate

And it has powerful advantages over quick-fix tactical solutions:

  • Your Jenkins jobs consume the credentials with no knowledge of Secrets Manager, so they stay vendor-independent.

  • The provider caches relevant Secrets Manager API calls, for a quicker and more reliable experience.

  • The provider integrates with the ecosystem of existing Jenkins credential consumers, such as the Git and SSH Agent plugins.

  • The provider records credential usage in the central Jenkins credentials tracking log.

  • Jenkins can use multiple credentials providers concurrently, so you can incrementally migrate credentials to Secrets Manager while consuming other credentials from your existing providers.

After the plugin’s first public release, developers at other companies adopted it too. It has had contributions so far from people at Elsevier, GoDaddy, and Northeastern University, as well as the fantastic Jenkins core team. We even got fan mail for our work!

In enterprise security, "The important things are always simple. The simple things are always hard. The easy way is always mined." (@thegrugq) It’s easy to buy a shiny ‘next generation' security appliance and drop it into your network. But it’s hard to embed the security fundamentals (like secrets management, OS patching, secure development) across your organisation. This Jenkins plugin is part of the effort [1] to take one of the persistent hard problems in security, and make it easier for everyone.


1. If you’re on Azure or you run most of your workload on Kubernetes, check out the Azure Credentials Plugin and the Kubernetes Credentials Provider Plugin.

Generic Webhook Trigger Plugin

$
0
0

This post will describe some common problems I’ve had with Jenkins and how I solved them by developing Generic Webhook Trigger Plugin.

The Problem

I was often struggling with the same issues when working with Jenkins:

  • Code duplication and security - Jenkinsfiles in every repository.

  • A branch is not a feature - Parameterized jobs on master branch often mix parameters relevant for different features.

  • Poorly documented trigger plugins - Proper documented services but poorly documented consuming plugins.

Code Duplication And Security

Having Jenkinsfiles in every Git repository allows developers to let those files diverge. Developers pushes forward with their projects and it is hard to maintain patterns to share code.

I have, almost, solved code duplication with shared libraries but it does not allow me to setup a strict pattern that must be followed. Any developer can still decide to not invoke the features provided by the shared library.

There is also the security aspect of letting developers run any code from the Jenkinsfiles. Developers might, for example, print passwords gathered from credentials. Letting developers execute any code on the Jenkins nodes just does not seem right to me.

A Branch Is Not A Feature

In Bitbucket there are projects and each project has a collection of git repositories. Something like this:

  • PROJ_1

    • REPO_1

    • REPO_2

  • PROJ_2

    • REPO_3

Lets think about some features we want to provide for these repositories:

  • Pull request verification

  • Building snapshot (or pre release if you will)

  • Building releases

If the developers are use to the repositories being organized like this in Bitbucket, should we not organize them the same way in Jenkins? And if they browse Jenkins should they not find one job per feature, like pull-request, snapshot and release? Each job with parameters only relevant for that feature. I think so! Like this:

  • / - Jenkins root

    • /PROJ_1 - A folder, lists git repositories

      • /PROJ_1/REPO_1 - A folder, lists jobs relevant for that repo.

      • /PROJ_1/REPO_1/release - A job, performs releases.

      • /PROJ_1/REPO_1/snapshot - A job, performs snapshot releases.

      • /PROJ_1/REPO_1/pull-request - A job, verifies pull requests.

  • …​

In this example, both snapshot and release jobs might work with the same git branch. The difference is the feature they provide. Their parameters can be well documented as you don’t have to mix parameters relevant for releases and those relevant for snapshots. This cannot be done with Multibranch Pipeline Plugin where you specify parameters as properties per branch.

Documentation

Webhooks are often well documented in the services providing them. See:

It bothered me that, even if I understood these webhooks, I was unable to use them. Because I needed to perform development in the plugin I was using in order to provide whatever value from the webhook to the build. That process could take months from PR to actual release. Such a simple thing should really not be an issue.

The Solution

My solution is pretty much back to basics: We have an automation server (Jenkins) and we want to trigger it on external webhooks. We want to gather information from that webhook and provide it to our build. In order to support it I have created the Generic Webhook Trigger Plugin.

The latest docs are available in the repo and I also have a fully working example with GitLab implemented using configuration-as-code. See the repository here.

Code Duplication And Security

I establish a convention that all developers must follow. Instead of letting the developers explicitly invoke the infrastructure from Jenkinsfiles. There are rules to follow, like:

  • All git repositories should be built from the root of the repo.

  • If it contains a gradlew

    • Build is done with ./gradlew build

    • Release is done with ./gradlew release

    • …​ and so on

  • If it contains a package.json

    • Build is done with npm run build

    • Release is done with npm run release

    • …​ and so on

With these rules, pipelines can be totally generic and no Jenkinsfiles are needed in the repositories. Some git repositories may, for some reason, need to disable test cases. That can be solved by allowing repositories to add a special file, perhaps jenkins-settings.json, let the infrastructure discover and act on its content.

This also helps the developers even when not doing CI. When they clone a new, to them unknown, repository they will know what commands can be issued and their semantics.

A Branch Is Not A Feature

I implement:

By integrating with the git service from Job DSL I can automatically find the git repositories. I create jobs dynamically organized in folders. Also invoking the git service to setup webhooks triggering those jobs. The jobs are ordinary pipelines, not multibranch, and they don’t use Jenkinsfile from Git but instead Jenksinfile configured in the job using Job DSL. So that all job configurations and pipelines are under version control. This is all happening here.

Documentation

The plugin uses JSONPath, and also XPath, to extract values from JSON and provide them to the build. Letting the user pick whatever is needed from the webhook. It also has a regular expression filter to allow not triggering for some conditions.

The plugin is not very big, just being the glue between the webhook, JSONPath/XPath and regular expression. All these parts are very well documented already and I do my best supporting the plugin. That way this is a very well documented solution to use!

2019 Jenkins Board and Officer Elections Results

$
0
0

Jenkins Elections

The Jenkins community has recently completed the 2019 elections for Board and Officer positions. The call for nominations concluded on Nov 25 and the election results were announced in the developer mailing list on Nov 28.

On behalf of the Jenkins community, we congratulate all elected board members and officers! We also thank all contributors who participated this year: all nominees and hundreds of voters. These are the first elections ever conducted by the Jenkins project, and it is a big milestone for the community.

Election results:

If you are interested to learn more, please see the blog post below.

Board election details

  1. Oleg Nenashev (Condorcet winner: wins contests with all other choices)

  2. Mark Waite loses to Oleg Nenashev by 181–127

  3. Ullrich Hafner loses to Oleg Nenashev by 198–115, loses to Mark Waite by 171–133

  4. Alex Earl loses to Oleg Nenashev by 225–82, loses to Ullrich Hafner by 168–128

  5. Oliver Gondža loses to Oleg Nenashev by 227–76, loses to Alex Earl by 151–136

  6. Zhao Xiaojie (aka Rick) loses to Oleg Nenashev by 233–82, loses to Oliver Gondža by 160–131

Although Mark Waite came second in the voting results, being on the board would violate the Corporate Involvement clause which states that "the number of board members affiliated with one company must be less than 50%". Based on that rule, the third seat Alex Earl will join the Jenkins board. At the same time, Mark Waite will take the newly introduced role of Documentation officer.

All new board members are elected for a 2-year term, unless they step down earlier. The estimated end of term for them is December 02, 2021. The actual date will depend on the election schedule in 2021.

Officer election details

We have reelected all 5 officers for the new 1-year term, with the estimated end of term on Dec 02, 2020.

When an officer position has only one candidate that is willing to accept the nomination, there is no reason to vote on that position. This year some nominees declined the nominations before the election happened, and 3 officer nominations were finally uncontested:Olivier Vernin - infrastructure officer,Oliver Gondža - release officer,Mark Waite - documentation officer.

Statistics

Here are some voting stats from these elections:

  • Total number of eligible accounts: 91,015

  • Total number of registered voters: 831

  • Total number of votes: 343

This election was hosted on the Condorcet Internet Voting Service (CIVS). While preparing for the elections, we discovered that CIVS is unable to support our large number of eligible voters. We created a voter registration system to identify voters and then registered those voters with CIVS. The workaround required a slight voting delay. Special thanks to Olivier Vernin and Tracy Miranda who made it possible!

What’s next for the board?

In short term, the renewed board will focus on running the Jenkins governance processes (meetings, budget approvals, funding, etc.) and defining next steps towards improving the project. One of the priorities will be to organize knowledge and permission transfers to new board members so that they can be effective in their new roles. There are also pending activities like Jenkins' transition to Continuous Delivery Foundation which require attention from board members.

For longer term, there are some ideas floating around: roadmap for key components, long-anticipated architecture changes (UX revamp, pluggable storage, cloud native Jenkins), adopting Linux Foundation best practices like Core Infrastructure Initiative, contributor onboarding, etc. Such initiatives are instrumental for further evolvement of the Jenkins project, and the board could help to facilitate them in the community. The ideas will be discussed in mailing lists and during governance meetings. If you would like to share your vision and ideas about what’s needed in the project, it is definitely a great time to do so!

Feedback

We will also also plan to conduct a public retrospective at one of the next Advocacy and Outreach SIG meetings.

Jenkins project plans to conduct elections every year. We appreciate and welcome any feedback regarding the election process. Please use the following channels for feedback and suggestions:

Google Summer of Code 2020 call for Project ideas and Mentors

$
0
0
Google Summer of Code (GSoC) is as program where students are paid a stipend by Google to work on a free open source project. Students work on the project full-time for four months (May to August). Mentors are actively involved with students starting at the end of February when students start to work on and submit their applications. (see the timeline)

Jenkins GSoC

We are looking for project ideas and mentors to participate in GSoC 2020. GSoC project ideas are coding projects that university or college students can accomplish in about four months. The coding projects can be new features, plugins, test frameworks, infrastructure, etc. Anyone can submit a project idea, but of course we like it even better if you offer to mentor your project idea.

We accept new project ideas at any time, BUT we need a series of ideas READY before February 5th, 2020 at 7pm UTC, which is the deadline for the Jenkins organization to apply to the GSoC program. So send us your project ideas before the begining of February so they can get a proper review by the GSoC committee and by the community.

How to submit a project idea

For 2020, we have simplified the process. Simply create a pull-request with your idea in a .adoc file in the idea folder. It is no longer necessary to submit a Google Doc, but it will still work if you want to do that. See the instructions on submitting ideas which include an .adoc template and some examples.

Current list of ideas

We currently have a list of project ideas for students to browse, copied from last year. Note that this list is subject to change.

What does mentoring involve?

Potential mentors are invited to read the information for mentors. Note that being a GSoC mentor does not require expert knowledge of Jenkins. Mentors do not work alone. We make sure that every project has at least two mentors. GSoC org admins will help to find technical advisors, so you can study together with your students.

Mentoring takes about 5 to 8 hours of work per week (more at the start, less at the end). Mentors provide guidance, coaching, and sometimes a bit of cheerleading. They review student proposals, pull-requests and the students presentations at the evaluation phase. They fill in the Google provided evaluation report form at the end of coding periods.

What do you get in exchange?

In return of mentoring, a student works on your project full time for four months. Think about the projects that you’ve always wanted to do but never had the time…​

Having a mentoring opportunity also means that you get to improve your management and people skills.

As well, up to two mentors per organization are elligible to participate in the Google Mentor Summit taking place each year. The Jenkins Org Admins try to send different mentors each year. It is also possible to win an additional seat at the summit in the "last minute draw" (Google draws mentors at random to fill the cancellations and empty seats).

See this post from one of the 2019 mentors on the kind of experience this was.

GSoC is a pretty good return on the investment!

For any question, you can find the GSoC Org Admins, mentors and participants on the GSoC SIG Gitter chat.

Happy New Year! 2019/2020 edition

$
0
0

Jenkins project congratulates all users and contributors with the New Year! Let’s take a look at some changes this year.

NewYear

Highlights

If you are interested to know more about Jenkins features introduced in 2019, stay tuned for a separate blog post about it (coming soon!).

Project updates

Highlights above do not cover all advancements we had in the project. Below you can find slides from the Jenkins contributor summit in Lisbon. There we had project updates by officers, SIG and sub-project leaders. See the slide deck to know about: Jenkins Core, Jenkins Pipeline, Configuration-as-Code, Security, UX Overhaul, Jenkins Infrastructure, platform support and documentation.

Some stats and numbers

If this section seems to be too long for you, here is some infographic prepared by Tracy Miranda: top-level Jenkins stats and comparison with other projects in Continuous Delivery FoundationCloud Native Computing Foundation. As you may see, Jenkins is pretty big :)

Jenkins 2019 in numbers

Community. Over the past year we had 5433 contributors in GitHub repositories (committers, reviewers, issue submitters, etc.). We had 1892 unique committers who created 7122 pull requests and 45484 commits, bots excluded. Contributors represent 273 companies and 111 countries, 8% of contributors are recognized as independent. The most active repositories were Jenkins Core and jenkins.io. The most active month was October 2019 when we reached the record high number of contributions: 915 unique contributors, 124 of them were first-timers, thanks to Hacktoberfest!.

Jenkins core. In 2019 Jenkins core had 54 weekly and 13 LTS releases with several hundreds of notable fixes/enhancements. There was a login screen extensibility rework, many update manager and administrative monitors improvements. We also introduced support for user timezones, not speaking of emojis support 🥳. There was also a lot of housekeeping work: better APIs, codebase refresh, cleaning up static analysis warnings and removing deprecated features like Remoting CLI. The core’s components also got major updates. Only Jenkins Remoting got 11 releases with stability improvements and new features like support of inbound connections to headless Jenkins masters. There are also major incoming features like JEP-222: WebSocket Services support, UI look&feel updates, JENKINS-12548: Readonly system configuration support, Docker images for new platforms like Arm. On the community side a Core pull request reviewers team and added 9 contributors there.

Plugins. There were 2654 plugin releases, and 157 NEW plugins have been hosted in the Update Center. Jenkins ecosystem got a lot of new integrations with Development and DevOps tools. Also, warm welcome back to the Scriptler Plugin which was depublished in 2017 due to security issues. If you are afraid about such plugin numbers and dependency management, there is a new Plugin Installation Manager CLI Tool which should help Jenkins users to manage plugins more efficiently.

Security. It was a hot year for the Jenkins Security Team. There were 5security advisories for the core and 20 - for plugins. In total we disclosed 288 security vulnerabilities across the project, including some backlog cleaning for unmaintained plugins.Script Security Plugin was the hottest plugin with 10 critical fixes addressing various sandbox bypass vulnerabilities. Plain text storage and unprotected credentials were the most popular vulnerability type 120 disclosures in 2019. It was made possible by hundreds of reports submitted by contributors after code surveys, special thanks to Viktor Gazdag who reported the most of the issues and became the Jenkins 2019 Security MVP (check out his story here).

Infrastructure. Got Jenkins? If so, you rely on Jenkins update centers, website and issue tracker. All these and many other services are maintained by the Jenkins Infrastructure Team. This year the team handled more than 400 requests in the bugtracker, and many other informal requests. In total, more than 30 people contributed to Jenkins infrastructure this year (website content is excluded). We also deployed 4 new services, migrated 7 services from Azure Container Service to Azure Kubernetes Service and updated many other services. More changes will happen in the next months, and we are looking for new INFRA team members!

Documentation. Only last quarter we had 178 contributors to Jenkins documentation. It includes jenkins.io and other documentation hosted on GitHub, Wiki is not included. There is also ongoing migration plugin documentation from Jenkins Wiki to GitHub (announcement). Since the beginning of the project in Sep 2019, more than 150 plugin were migrated, and they got significant documentation revamp during the migration. You can see the current status https://jenkins-wiki-exporter.jenkins.io/progress. We also work on introducing changelog automation in the project.123 plugins have already adopted the new changelog tools, powered by Release Drafter. Also, we had more than 60 technical blog posts published on jenkins.io.

Configuration as Code was one of the most popular areas this year.Jenkins Configuration as Code Plugin had more than 30 releases with new features and bug fixes. More than 50 plugins have been also updated in order to offer better configuration-as-code support. As a result, the JCasC Plugin got massive adoption this year (from 2000 to almost 8000 installations), and now it becomes a de-facto standard for managing Jenkins as code. This year we also ran our very first CommunityBridge project devoted to JCasC Schema validation and developer tools.

Events and outreach programs. In 2019 we participated in multiple conferences, including FOSDEM, DevOps World | Jenkins World, SCALE. More than 40 Jenkins Area Meetups were organized across the world, and there were many other meetups devoted to Jenkins. We also kept expanding our outreach programs. In total we had 12 students who participated in Google Summer of Code, Outreachy and newly introduced Community Bridge. We also had the biggest ever Hacktoberfest with 664 pull requests and 102 participants. These outreach programs help us to deliver new features in Jenkins. For example, this year we added Multi-branch Pipeline support for Gitlab and a new Plugin Installation Manager Tool during GSoC, and Outreachy resulted in a new Audit Log Plugin.

Where did we get those stats? GitHub stats came from the CDF DevStats service. These stats include all repositories in the jenkinsci organization and most popular repositories in [jenkins-infra], other organizations/repositories within the project are not included. Other stats came from project reports, component changelogs, Jenkins usage statistics service, plugin releases history.

What’s next?

Year 2020 will be pretty busy for the Jenkins project. There are many long-overdue changes in the project, which need to happen if we want the project to succeed. As it was written Board elections blogpost, there are many areas to consider: UX revamp, cloud native Jenkins, pluggable storage, etc. In the coming months there will be a lot of discussions in mailing lists and special interest groups, and we invite all teams to work on their roadmaps and to communicate them in the community.

Next month we will participate in FOSDEM, and there will be a Jenkins stand there. On January 31st we will also host a traditional contributor summit in Brussels, where we will talk about next steps for the project, in terms of technical roadmaps and the project governance. If you are interested in Jenkins, stop by at our community booths and join us at the summit! See this thread for more information.

We also plan to continue all outreach programs. At the moment we are looking for Google Summer of Code 2020 mentors and project ideas (announcement), and we will be also interested to consider non-coding projects as a part of other programs like CommunityBridge. We also work on improving contribution guidelines for newcomers and expert contributors. If you are interested, please contact the Advocacy and Outreach SIG.

And even more

This blog post does not provide a full overview of what changed in the project. The Jenkins project consists of more than 2000 plugins and components which are developed by thousands of contributors. Thanks to them, a lot of changes happen in the project every day. We are cordially grateful to everybody who participates in the project, regardless of contribution size. Everything matters: new features, bug fixes, documentation, blog posts, well reported issues, Stackoverflow responses, etc. THANKS A LOT FOR ALL YOUR CONTRIBUTIONS!

So, keep updating Jenkins and exploring new features. And stay tuned, there is much more to come next year!

Atlassian's new Bitbucket Server integration for Jenkins

$
0
0

We know that for many of our customers Jenkins is incredibly important and its integration with Bitbucket Server is a key part of their development workflow. Unfortunately, we also know that integrating Bitbucket Server with Jenkins wasn’t always easy – it may have required multiple plugins and considerable time. That’s why earlier this year we set out to change this. We began building our own integration, and we’re proud to announce that v1.0 is out.

The new Bitbucket Server integration for Jenkins plugin, which is built and supported by Atlassian, is the easiest way to link Jenkins with Bitbucket Server. It streamlines the entire set-up process, from creating a webhook to trigger builds in Jenkins, to posting build statuses back to Bitbucket Server. It also supports smart mirroring and lets Jenkins clone from mirrors to free up valuable resources on your primary server.

Our plugin is available to install through Jenkins now. Watch this video to find out how, or read the BitBucket Server solution page to learn more about it.

Once you’ve tried it out we’d love to hear any feedback you have. To share it with us, visit https://issues.jenkins-ci.org and create an issue using the component atlassian-bitbucket-server-integration-plugin.

FOSDEM 2020 is coming

$
0
0
FOSDEM

FOSDEM 2020 is coming and with it, a lot of great folks come in town. It’s always a great moment to meet Jenkins community members, share stories and get inspired. I hope that this year will be as great as it always been and for that, we organize a few things

Things we’ll do

During the whole event, we’ll be virtually on the Gitter

On the Thursday 30 of January, there will be two workshops one about Jenkins Pipelines lead by Mark Waite, and a second one about JenkinsX by Viktor Farcic.

On the Friday 31 of January, the Jenkins project will hold a Contributor Summit where we invite active contributors and those who are interested in working on foundation projects, e.g. key architecture changes and projects (UX, JCasC, Cloud native Jenkins, etc.), governance, infrastructure. There will be no user-focused topics (no presentations, no trainings, etc.) but we will focus on defining key priorities for the project, building a roadmap and resolving issues we have in the project at the moment. We’ll end up the day with our now traditional Orval and flemish beef stew at Le Roy d’Espagne

Finally the FOSDEM, the 01 and 02 of February, we’ll all be at FOSDEM. So come and say "hi" at the Jenkins/JenkinsX stand, inside the CICD Devroom.

Or just come and share beers

Cheers

Atomium

A new chapter for Kohsuke

$
0
0

2020 is going to be a year of change for me. By the end of January, I’ll be officially stepping back from Jenkins, switching my role at CloudBees to an advisor, and turning attention to my new startup. The rest of this post is to contextualize this transition, because if you haven’t been working closely with me, this might come across as a surprise.

ThanksKohsuke

Jenkins has been an amazing journey that never stopped giving. I have loved it all - especially meeting the users around the world who made Jenkins what it is today. As the creator of the project, at some point I started wondering how to pass the torch to the next leaders, how to get people to step up and drive it forward. Today, thanks to CloudBees and the community, there is a new generation of talented and capable leaders who are passionately driving things forward - and it’s been great to see. Newly elected board members, Jenkins X folks, just to name a few. These new people bring new culture and new code, and altogether it has created a positive jolt that pushed Jenkins out of  a local optimum I talked about. They have all my support and respect. In reality, my involvement with Jenkins lately has already been largely symbolic, a little bit like an emperor of Japan or a queen of the UK. That’s why this announcement has little practical impact on the forward motion of Jenkins.

Several years ago, I used to feel like the sky would fall down if I stepped aside. Somewhere in 2019, I suddenly noticed that I wasn’t feeling like that at all anymore. The shift was gradual and steady, so I’m not sure exactly when I crossed the threshold, but in 2019 it was clear I was on the other side. That’s how I knew I could finally end this chapter of my life. 15 years with Jenkins and 9 years with CloudBees. That is a long time.

I hope you will be wondering what is my new chapter. I’m launching a new startup, Launchable, with my old time buddy Harpreet Singh. I have known him since my days at Sun Microsystems and JavaEE, and he was my partner in crime at CloudBees to build the Jenkins business from scratch. He went to Atlassian running its BitBucket business for a while, but now he and I are back sitting side by side again. A number of CloudBees people invested, including Sacha Labourey,Bob Bickel, and John Vrionis.

Through Jenkins and CloudBees, I was able to push the state of automation forward in software development. Such automation is producing a lot of data, but we are not using that data to improve our lives. It truly is a wasted gold mine. Launchable is working on harnessing that information to improve developer productivity. I wrote a separate blog post to discuss more about my thinking.

Lastly, even though I’m moving on from CloudBees as a full-time employee, I’m not completely going away. I’ll be still in the CloudBees orbit, as an advisor. I’m still very much invested both emotionally and financially in CloudBees. I’m still a big fan, and I’ll continue to cheer for them, but from the sideline. The same with Jenkins. I’m still on the governance board, ensuring the continuity. I’m also still on the Technical Oversight Committee of the Continuous Delivery Foundation, though my chairperson term will expire in March.

I’m incredibly grateful for the undeserved opportunity and the privilege given to me during this chapter. I was surrounded by wonderful, inspiring, and talented people, from whom I learned a lot. I can only hope that I was able to make a positive impact, and give something back in return to them. I won’t name names, but you know who you are, and we’ll stay in touch.

This year is going to be truly exciting for me. To infinity and beyond!!

Google Summer of Code 2019 Report

$
0
0

Google Summer of Code is much more than a summer internship program, it is a year-round effort for the organization and some community members. Now, after the DevOps World | Jenkins World conference in Lisbon and final retrospective meetings, we can say that GSoC 2019 is officially over. We would like to start by thanking all participants: students, mentors, subject matter experts and all other contributors who proposed project ideas, participated in student selection, in community bonding and in further discussions and reviews. Google Summer of Code is a major effort which would not be possible without the active participation of the Jenkins community.

In this blogpost we would like to share the results and our experience from the previous year.

Results

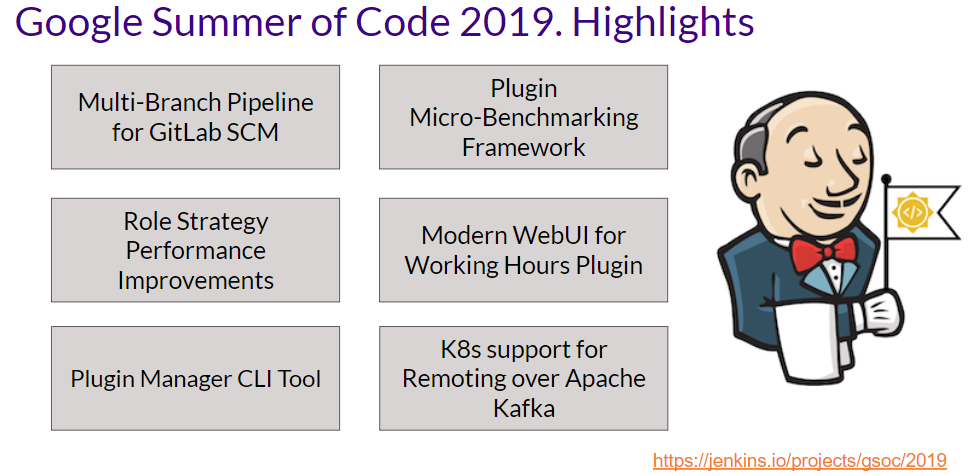
Highlights

Project details

We held the final presentations as Jenkins Online Meetups in late August and Google published the results on Sept 3rd. The final presentations can be found here:Part 1,Part 2,Part 3. We also presented the2019 Jenkins GSoC report at the DevOps World | Jenkins World San Francisco and at theDevOps World | Jenkins World 2019 Lisbon conferences.

In the following sections, we present a brief summary of each project, links to the coding phase 3 presentations, and to the final products.

Role Strategy Plugin Performance Improvements

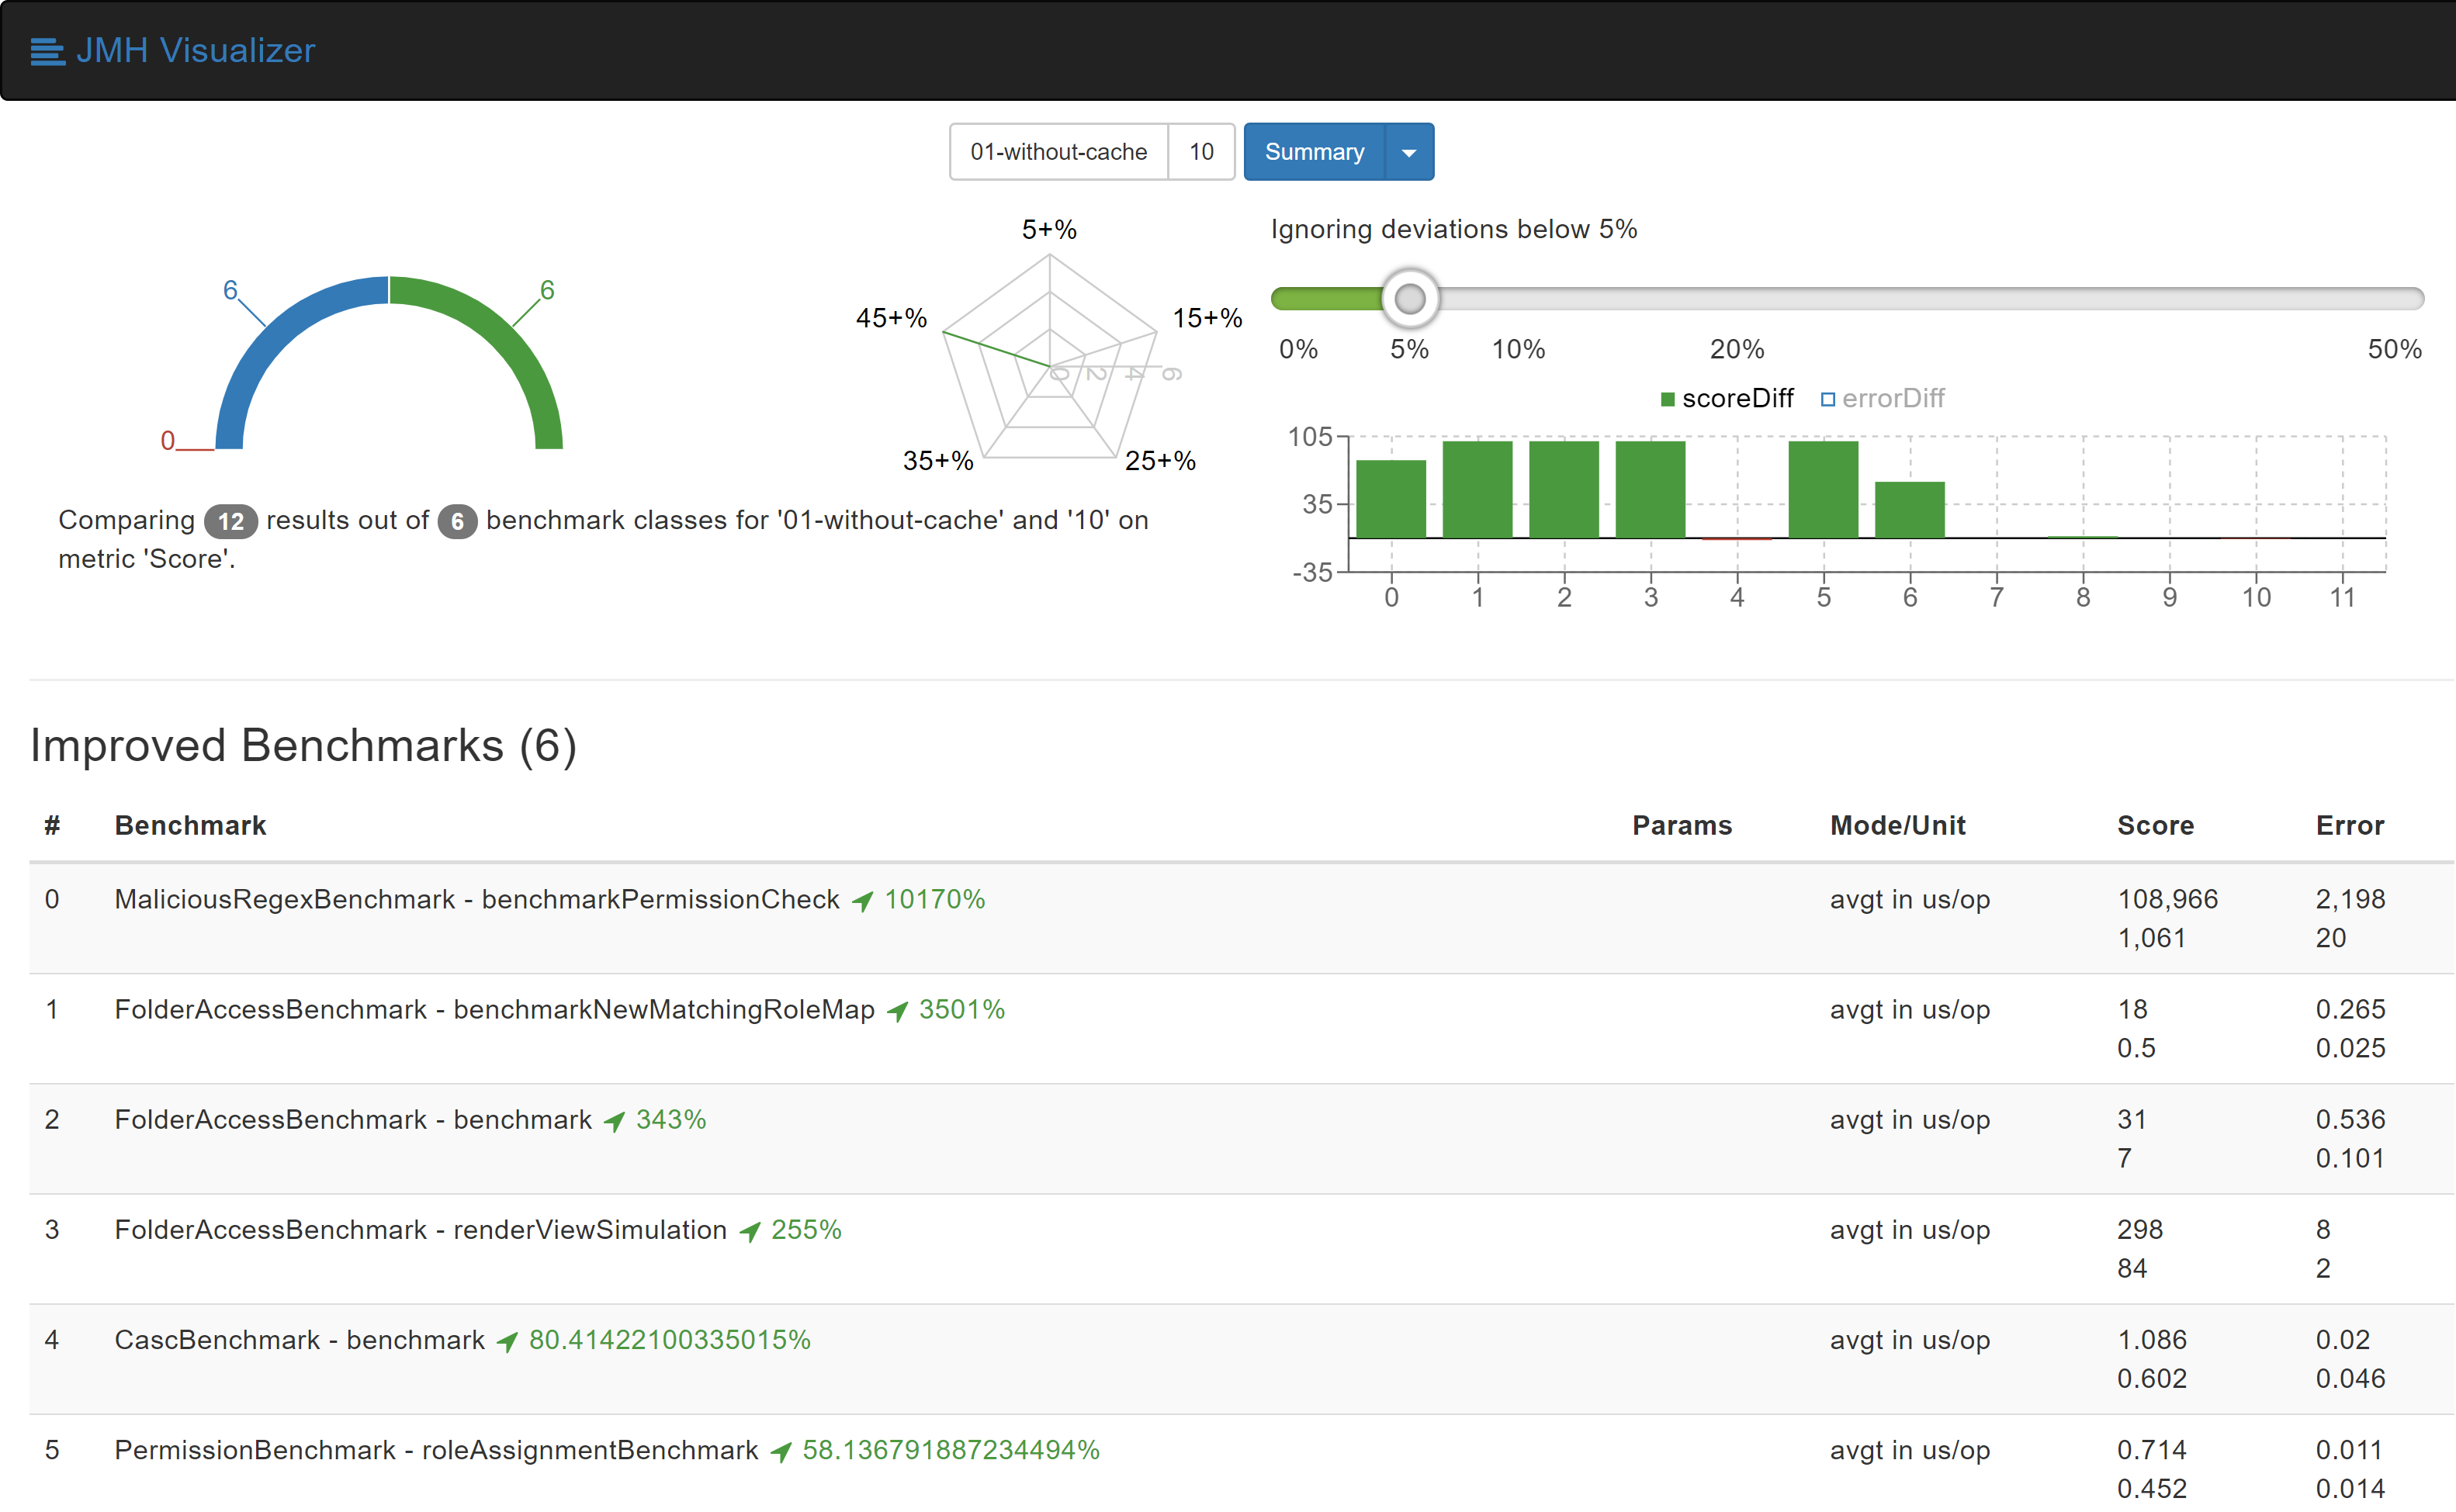
Role Strategy Plugin is one of the most widely used authorization plugins for Jenkins, but it has never been famous for performance due to architecture issues and regular expression checks for project roles.Abhyudaya Sharma was working on this project together with hist mentors:Oleg Nenashev, Runze Xia and Supun Wanniarachchi. He started the project from creating a new Micro-benchmarking Framework for Jenkins Plugins based on JMH, created benchmarks and achieved a 3501% improvement on some real-world scenarios. Then he went further and created a new Folder-based Authorization Strategy Plugin which offers even better performance for Jenkins instances where permissions are scoped to folders. During his project Abhyudaya also fixed the Jenkins Configuration-as-Code support in Role Strategy and contributed several improvements and fixes to the JCasC Plugin itself.

Role strategy performance improvements

Plugins Installation Manager CLI Tool/Library

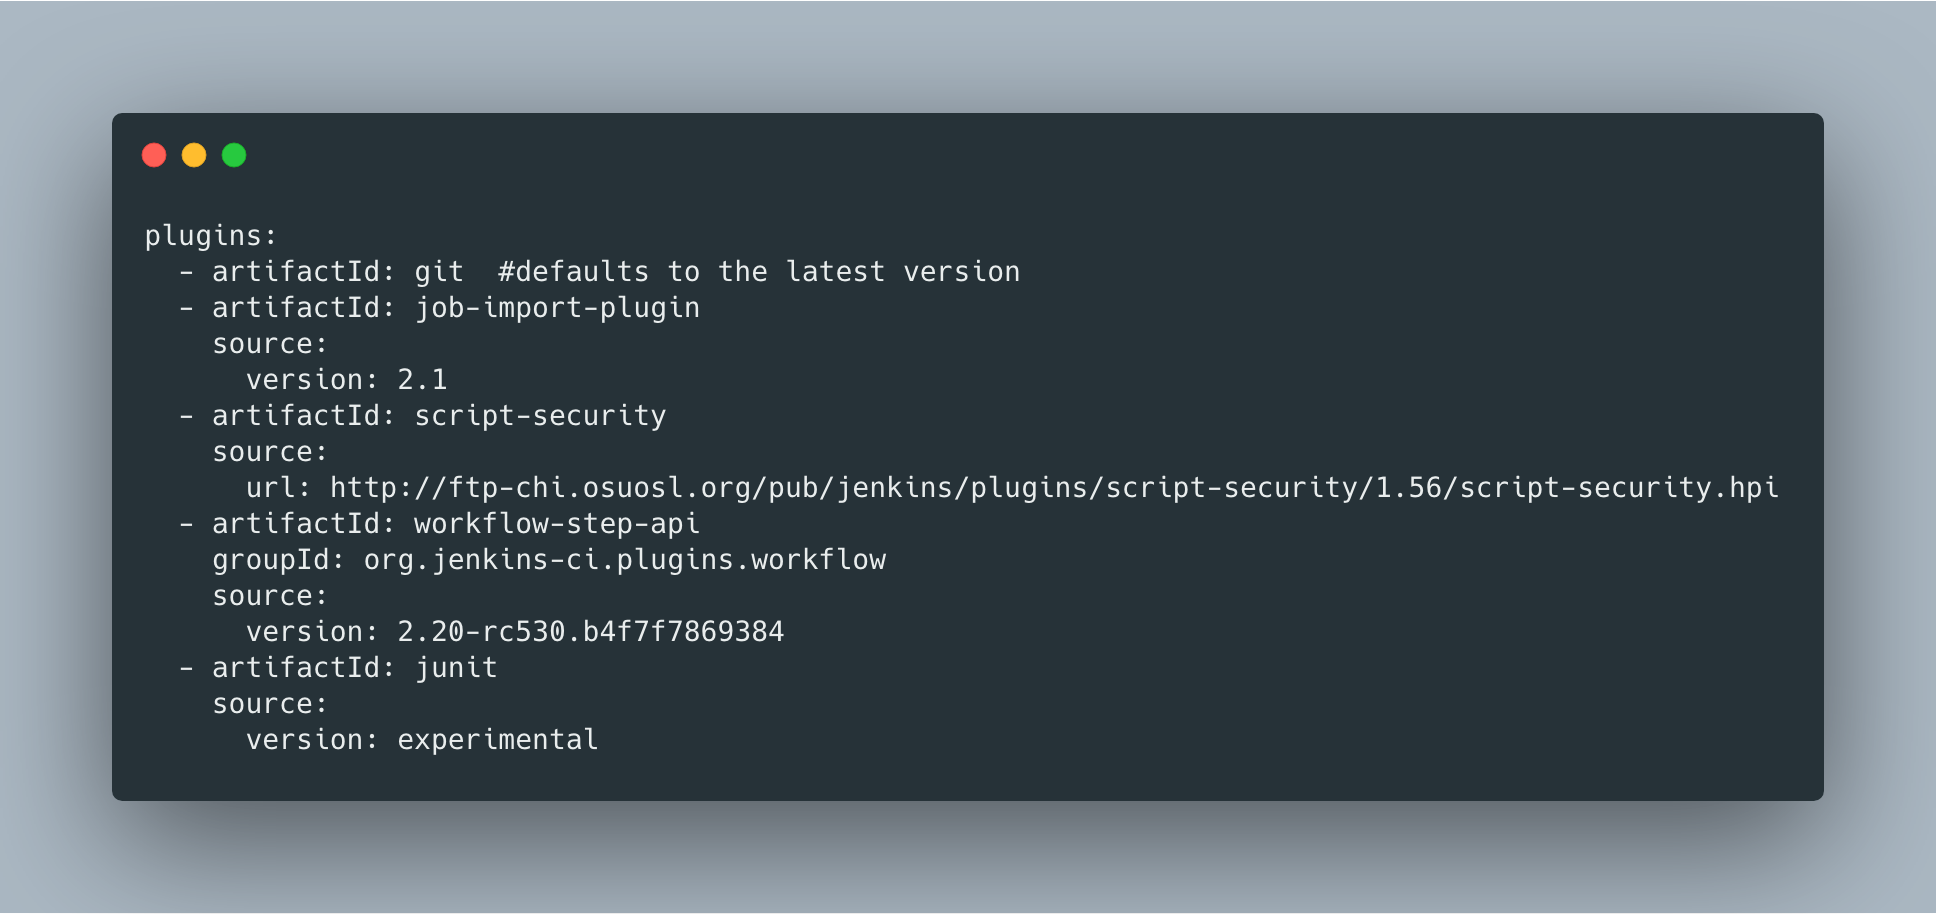
Natasha Stopa was working on a new CLI tool for plugin management, which should unify features available in other tools like install-plugins.sh in Docker images. It also introduced many new features like YAML configuration format support, listing of available updates and security fixes. The newly created tool should eventually replace the previous ones. Natasha’s mentors: Kristin Whetstone, Jon Brohauge and Arnab Banerjee. Also, many contributors from Platform SIG and JCasC plugin team joined the project as a key stakeholders and subject-matter experts.

Plugin Manager Tool YAML file

Working Hours Plugin - UI Improvements

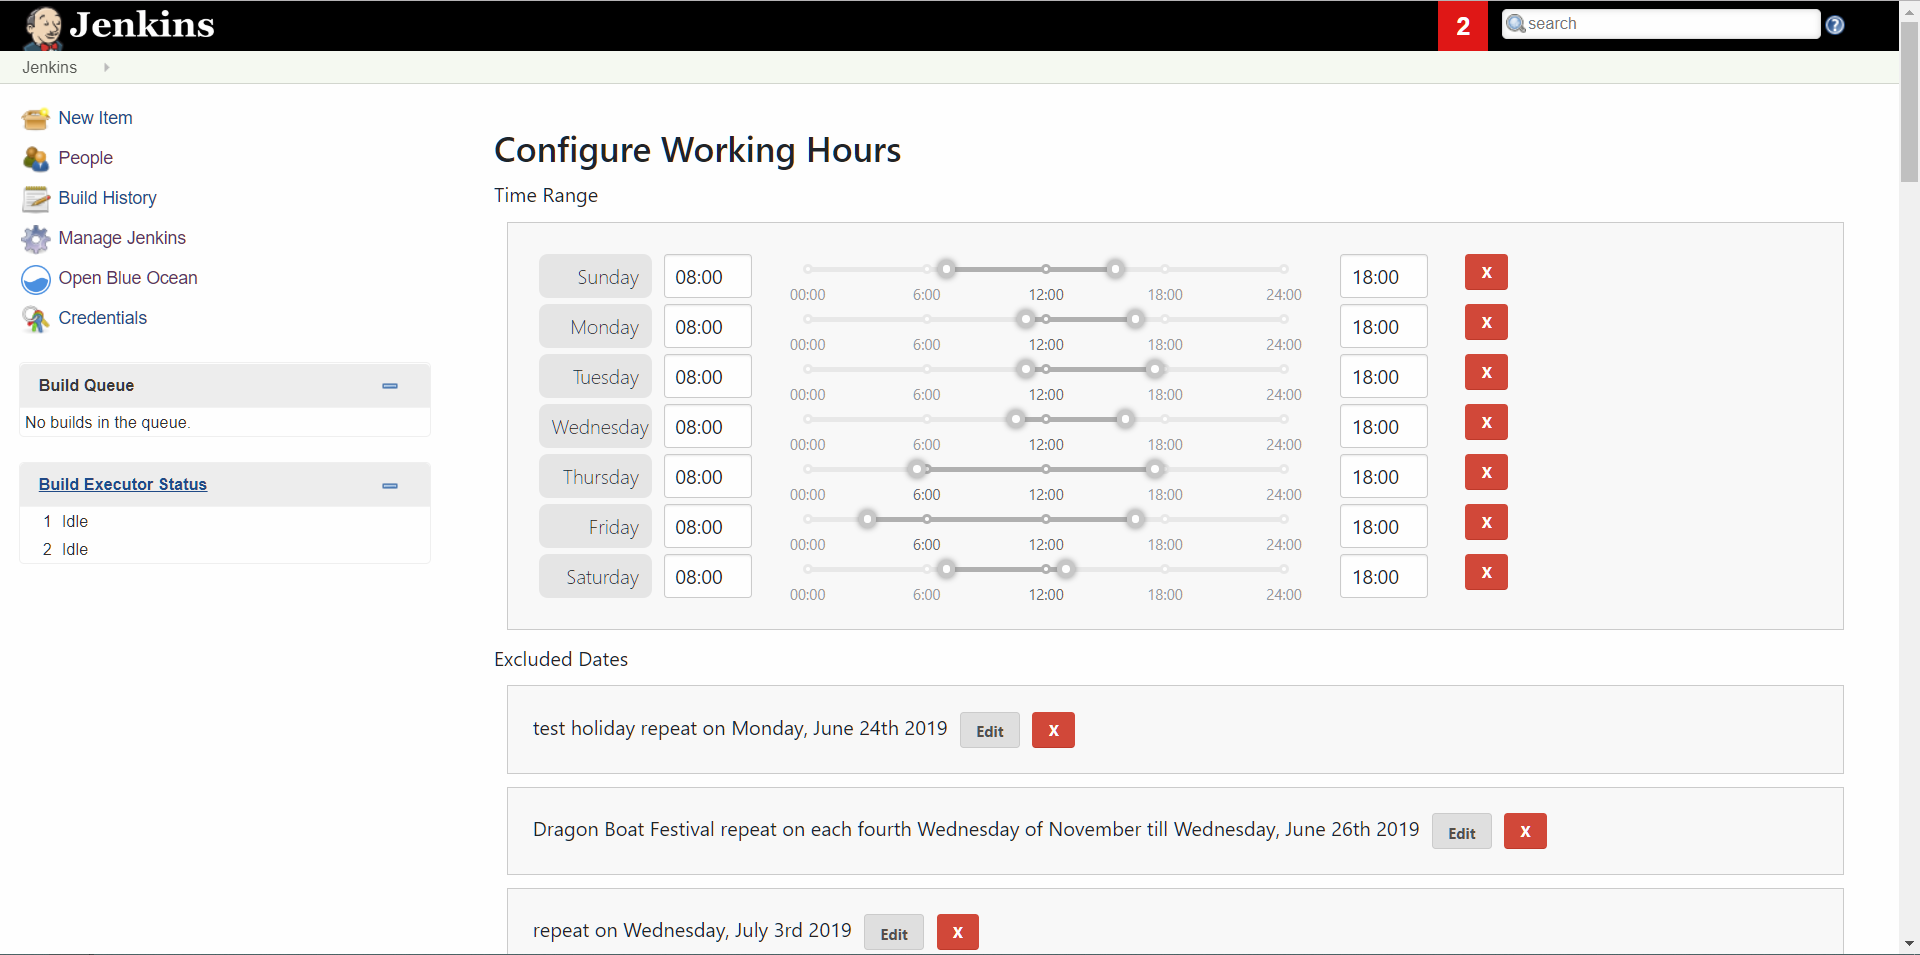
Jenkins UI and frontend framework are a common topic in the Jenkins project, especially in recent months after the new UX SIG was established.Jack Shen was working on exploring new ways to build Jenkins Web UI together with his mentor Jeff Pearce. Jack updated the Working Hours Plugin to use UI controls provided by standard React libraries. Then he documented his experienced and created template for plugins with React-based UI.

Web UI controls in React

Remoting over Apache Kafka with Kubernetes features

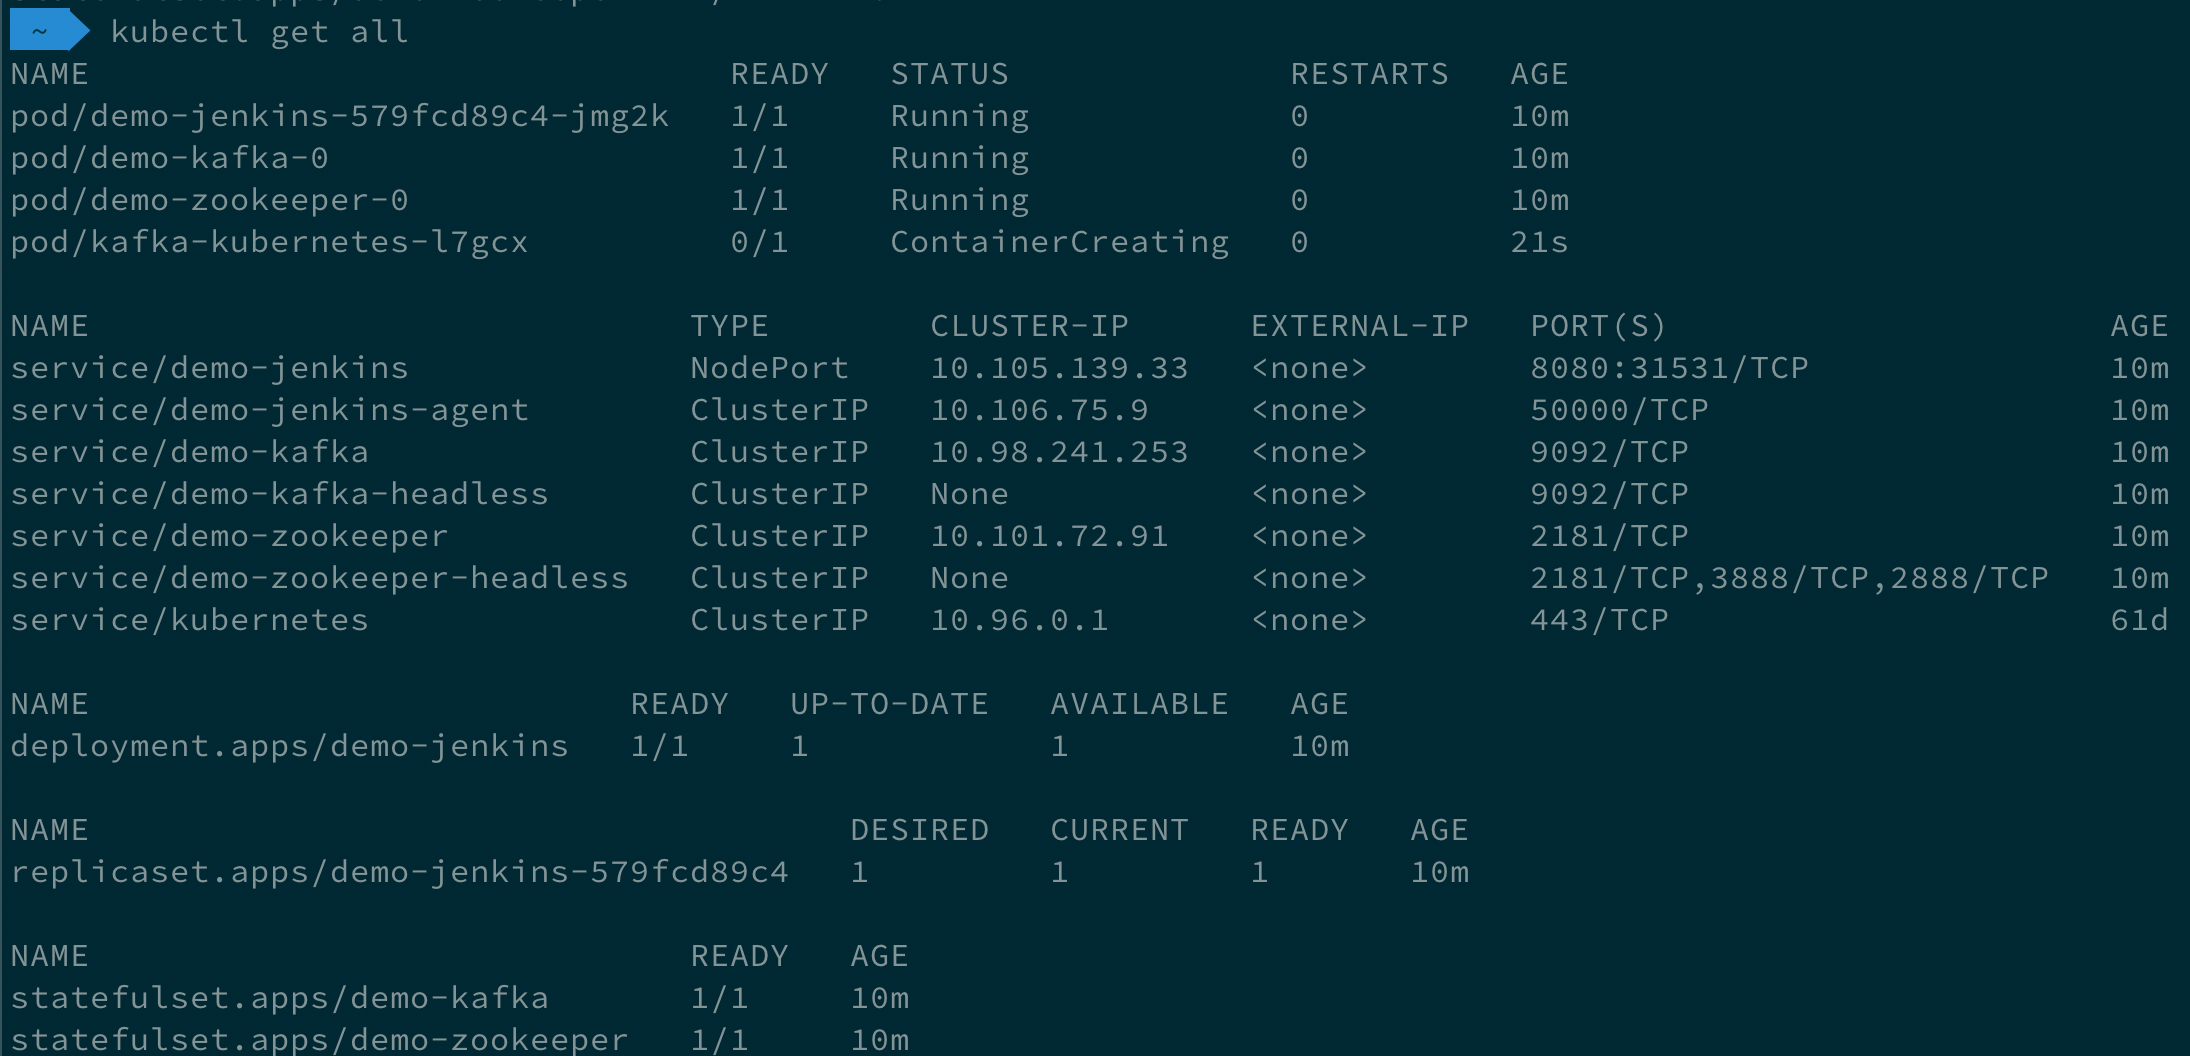
Long Le Vu Nguyen was working on extended Kubernetes support in the Remoting over Apache Kafka Plugin. His mentors were Andrey Falco and Pham vu Tuan who was our GSoC 2018 student and the plugin creator. During this project Long has added a new agent launcher which provisions Jenkins agents in Kubernetes and connects them to the master. He also created a Cloud API implementation for it and a new Helm chart which can provision Jenkins as entire system in Kubernetes, with Apache Kafka enabled by default. All these features were released in Remoting over Apache Kafka Plugin 2.0.

Jenkins in Kubernetes with Apache Kafka

Multi-branch Pipeline support for Gitlab SCM

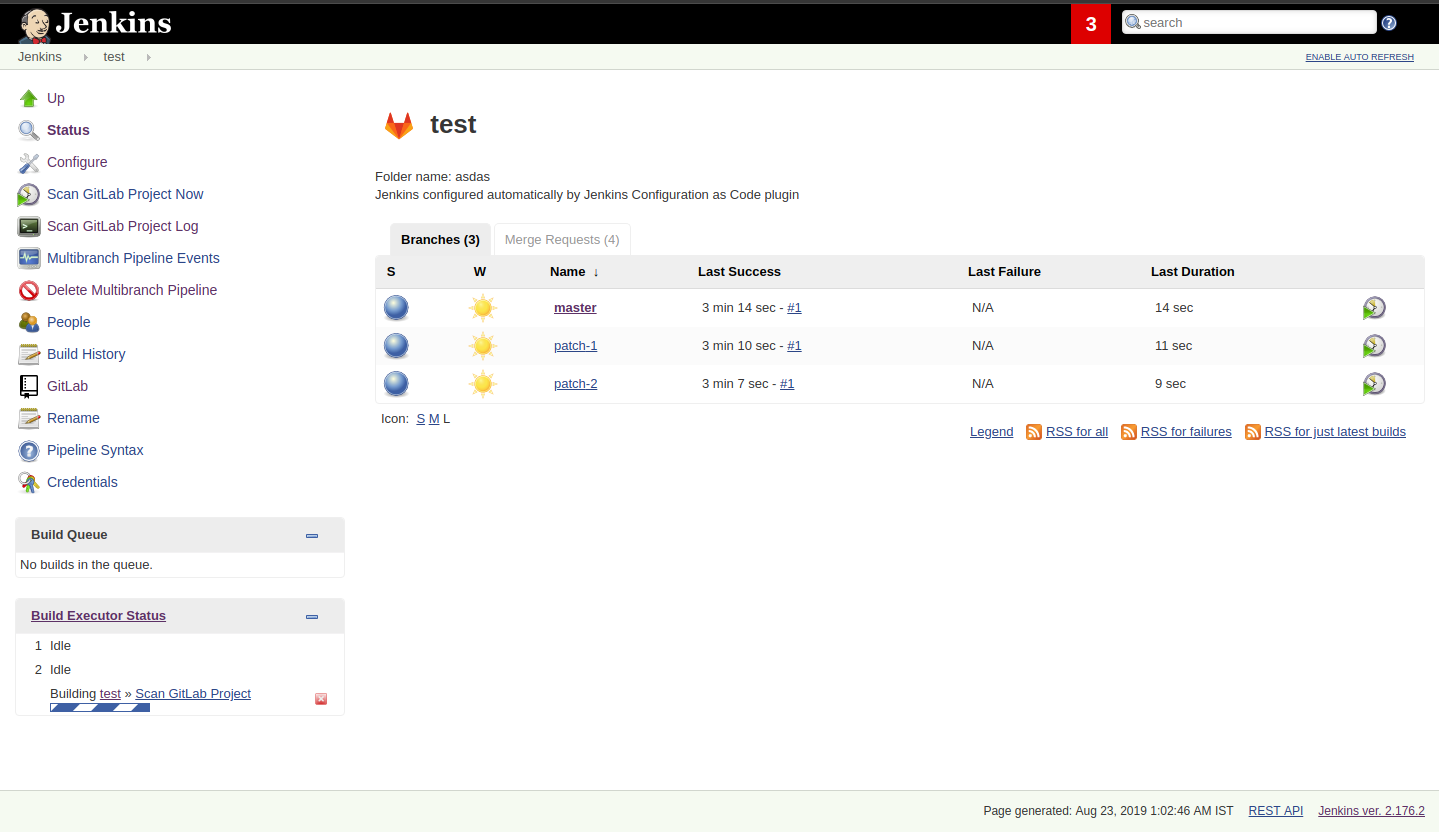
Parichay Barpanda was working on the new GitLab Branch Source Plugin with Multi-branch Pipeline Jobs and Folder Organisation support. His mentors wereMarky Jackson-Taulia,Justin Harringa,Zhao Xiaojie andJoseph Petersen. The plugin scans the projects, importing the pipeline jobs it identifies based on the criteria provided. After a project is imported, Jenkins immediately runs the jobs based on the Jenkinsfile pipeline script and notifies the status to GitLab Pipeline Status. This plugin also provides GitLab server configuration which can be configured in Configure System or via Jenkins Configuration as Code (JCasC). read more about this project in the GitLab Branch Source 1.0 announcement.

Gitlab Multi-branch Pipeline support

Projects which were not completed

Not all projects have been completed this year. We were also working on Artifact Promotion plugin for Jenkins Pipeline and on Cloud Features for External Workspace Manager Plugin, but unfortunately both projects were stopped after coding phase 1. Anyway, we got a lot of experience and takeaways in these areas (see linked Jira tickets!. We hope that these stories will be implemented by Jenkins contributors at some point.Google Summer of Code 2020 maybe?

Running the GSoC program at our organization level

Here are some of the things our organization did before and during GSoC behind the scenes. To prepare for the influx of students, we updated all our GSoC pages and wrote down all the knowledge we accumulated over the years of running the program. We started preparing in October 2018, long before the official start of the program. The main objective was to address the feedback we got during GSoC 2018 retrospectives.

Project ideas. We started gathering project ideas in the last months of 2018. We prepared a list of project ideas in a Google doc, and we tracked ownership of each project in a table of that document. Each project idea was further elaborated in its own Google doc. We find that when projects get complicated during the definition phase, perhaps they are really too complicated and should not be done.

Since we wanted all the project ideas to be documented the same way, we created a template to guide the contributors. Most of the project idea documents were written by org admins or mentors, but occasionally a student proposed a genuine idea. We also captured contact information in that document such as GitHub and Gitter handles, and a preliminary list of potential mentors for the project. We embedded all the project documents on our website.

Mentor and student guidelines. We updated the mentor information page with details on what we expect mentors to do during the program, including the number of hours that are expected from mentors, and we even have a section on preventing conflict of interest. When we recruit mentors, we point them to the mentor information page.

We also updated the student information page. We find this is a huge time saver as every student contacting us has the same questions about joining and participating in the program. Instead of re-explaining the program each time, we send them a link to those pages.

Application phase. Students started to reach out very early on as well, many weeks before GSoC officially started. This was very motivating. Some students even started to work on project ideas before the official start of the program.

Project selection. This year the org admin team had some very difficult decisions to make. With lots of students, lots of projects and lots of mentors, we had to request the right number of slots and try to match the projects with the most chances of success. We were trying to form mentor teams at the same time as we were requesting the number of slots, and it was hard to get responses from all mentors in time for the deadline. Finally we requested fewer slots than we could have filled. When we request slots, we submit two numbers: a minimum and a maximum. The GSoC guide states that:

  • The minimum is based on the projects that are so amazing they really want to see these projects occur over the summer,

  • and the maximum number should be the number of solid and amazing projects they wish to mentor over the summer.

We were awarded minimum. So we had to make very hard decisions: we had to decide between "amazing" and "solid" proposals. For some proposals, the very outstanding ones, it’s easy. But for the others, it’s hard. We know we cannot make the perfect decision, and by experience, we know that some students or some mentors will not be able to complete the program due to uncontrollable life events, even for the outstanding proposals. So we have to make the best decision knowing that some of our choices won’t complete the program.

Community Bonding. We have found that the community bonding phase was crucial to the success of each project. Usually projects that don’t do well during community bonding have difficulties later on. In order to get students involved in the community better, almost all projects were handled under the umbrella of Special Interest Groups so that there were more stakeholders and communications.

Communications. Every year we have students who contact mentors via personal messages. Students, if you are reading this, please do NOT send us personal messages about the projects, you will not receive any preferential treatment. Obviously, in open source we want all discussions to be public, so students have to be reminded of that regularly. In 2019 we are using Gitter chat for most communications, but from an admin point of view this is more fragmented than mailing lists. It is also harder to search. Chat rooms are very convenient because they are focused, but from an admin point of view, the lack of threads in Gitter makes it hard to get an overview. Gitter threads were added recently (Nov 2019) but do not yet work well on Android and iOS. We adopted Zoom Meetings towards the end of the program and we are finding it easier to work with than Google Hangouts.

Status tracking. Another thing that was hard was to get an overview of how all the projects were doing once they were running. We made extensive use of Google sheets to track lists of projects and participants during the program to rank projects and to track statuses of project phases (community bonding, coding, etc.). It is a challenge to keep these sheets up to date, as each project involves several people and several links. We have found it time consuming and a bit hard to keep these sheets up to date, accurate and complete, especially up until the start of the coding phase.

Perhaps some kind of objective tracking tool would help. We used Jenkins Jira for tracking projects, with each phase representing a separate sprint. It helped a lot for successful projects. In our organization, we try to get everyone to beat the deadlines by a couple of days, because we know that there might be events such as power outages, bad weather (happens even in Seattle!), or other uncontrolled interruptions, that might interfere with submitting project data. We also know that when deadlines coincide with weekends, there is a risk that people may forget.

Retrospective. At the end of our project, we also held a retrospective and captured some ideas for the future. You can find the notes here. We already addressed the most important comments in our documentation and project ideas for the next year.

Recognition

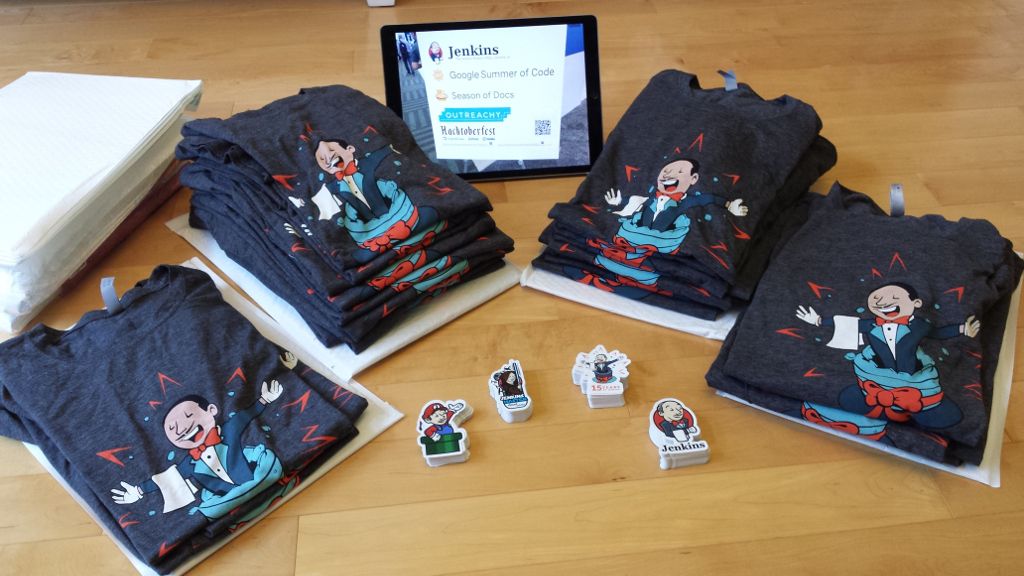
Last year, we wanted to thank everyone who participated in the program by sending swag. This year, we collected all the mailing addresses we could and sent to everyone we could the 15-year Jenkins special edition T-shirt, and some stickers. This was a great feel good moment. I want to personally thank Alyssa Tong her help on setting aside the t-shirt and stickers.

swag before shipping

Mentor summit

Each year Google invites two or more mentors from each organization to the Google Summer of Code Mentor Summit. At this event, hundreds of open-source project maintainers and mentors meet together and have unconference sessions targeting GSoC, community management and various tools. This year the summit was held in Munich, and we sent Marky Jackson and Oleg Nenashev as representatives there.

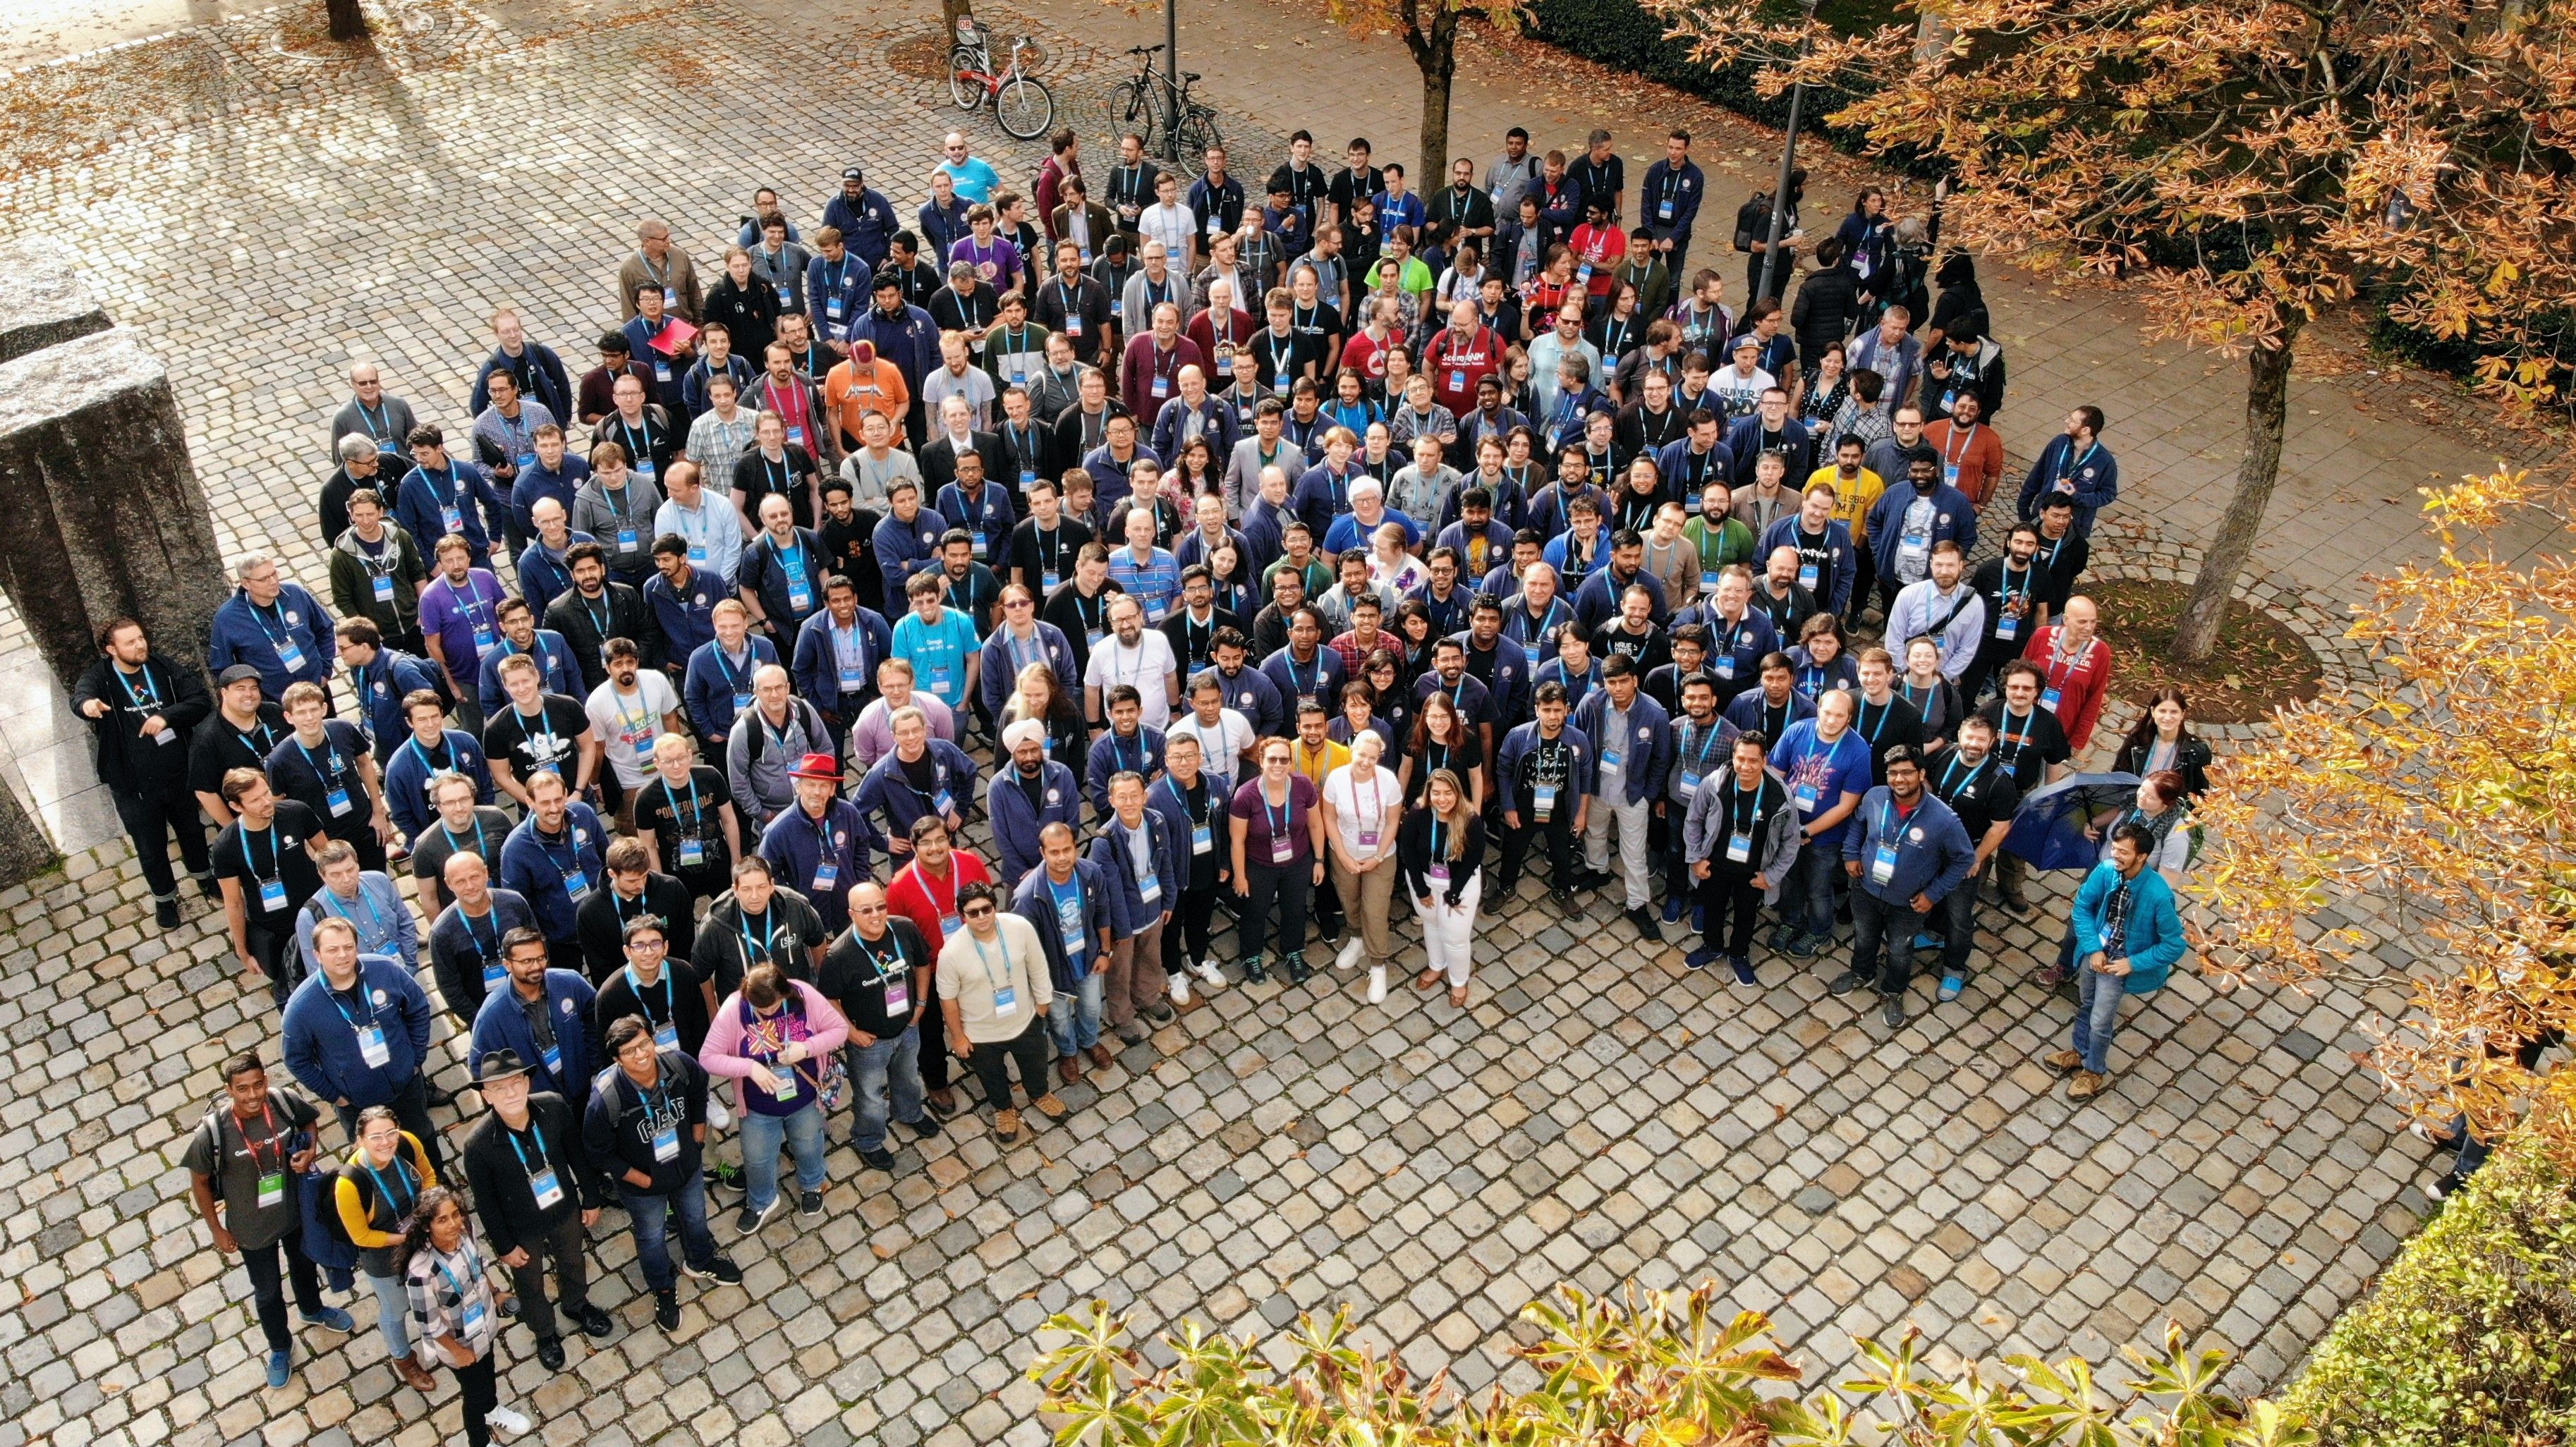
Apart from discussing projects and sharing chocolate, we also presented Jenkins there, conducted a lightning talk and hosted the unconference session about automation bots for GitHub. We did not make a team photo there, so try to find Oleg and Marky on this photo:

GSoC2019 Mentor summit

GSoC Team at DevOps World | Jenkins World

We traditionally use GSoC organization payments and travel grants to sponsor student trips to major Jenkins-related events. This year four students traveled to the DevOps World | Jenkins World conferences in San-Francisco and Lisbon. Students presented their projects at the community booth and at the contributor summits, and their presentations got a lot of traction in the community!

Thanks a lot to Google and CloudBees who made these trips possible. You can find a travel report from Natasha Stopa here, more travel reports are coming soon.

gsoc2019 team jw usgsoc2019 team jw lisbon

Conclusion

This year, five projects were successfully completed. We find this to be normal and in line with what we hear from other participating organizations.

Taking the time early to update our GSoC pages saved us a lot of time later because we did not have to repeat all the information every time someone contacted us. We find that keeping track of all the mentors, the students, the projects, and the meta information is a necessary but time consuming task. We wish we had a tool to help us do that. Coordinating meetings and reminding participants of what needs to be accomplished for deadlines is part of the cheerleading aspect of GSoC, we need to keep doing this.

Lastly, I want to thank again all participants, we could not do this without you. Each year we are impressed by the students who do great work and bring great contributions to the Jenkins community.

GSoC 2020?

Yes, there will be Google Summer of Code 2020! We plan to participate, and we are looking for project ideas, mentors and students. Jenkins GSoC pages have been already updated towards the next year, and we invite everybody interested to join us next year!

WebSocket

$
0
0

I am happy to report that JEP-222 has landed in Jenkins weeklies, starting in 2.217. This improvement brings experimental WebSocket support to Jenkins, available when connecting inbound agents or when running the CLI. The WebSocket protocol allows bidirectional, streaming communication over an HTTP(S) port.

While many users of Jenkins could benefit, implementing this system was particularly important for CloudBees because of how CloudBees Core on modern cloud platforms (i.e., running on Kubernetes) configures networking. When an administrator wishes to connect an inbound (formerly known as “JNLP”) external agent to a Jenkins master, such as a Windows virtual machine running outside the cluster and using the agent service wrapper, until now the only option was to use a special TCP port. This port needed to be opened to external traffic using low-level network configuration. For example, users of the nginx ingress controller would need to proxy a separate external port for each Jenkins service in the cluster. The instructions to do this are complex and hard to troubleshoot.

Using WebSocket, inbound agents can now be connected much more simply when a reverse proxy is present: if the HTTP(S) port is already serving traffic, most proxies will allow WebSocket connections with no additional configuration. The WebSocket mode can be enabled in agent configuration, and support for pod-based agents in the Kubernetes plugin is coming soon. You will need an agent version 4.0 or later, which is bundled with Jenkins in the usual way (Docker images with this version are coming soon).

Another part of Jenkins that was troublesome for reverse proxy users was the CLI. Besides the SSH protocol on port 22, which again was a hassle to open from the outside, the CLI already had the ability to use HTTP(S) transport. Unfortunately the trick used to implement that confused some proxies and was not very portable. Jenkins 2.217 offers a new -webSocket CLI mode which should avoid these issues; again you will need to download a new version of jenkins-cli.jar to use this mode.

The WebSocket code has been tested against a sample of Kubernetes implementations (including OpenShift), but it is likely that some bugs and limitations remain, and scalability of agents under heavy build loads has not yet been tested. Treat this feature as beta quality for now and let us know how it works!

Trip to DevOps World | Jenkins World

$
0
0

I had the privilege of being invited to DevOps World | Jenkins World 2019 for presenting the work I did during Google Summer of Code 2019. What follows is a day-by-day summary of an amazing trip to the conference.

Day 0: December 1, 2019

Travelling to Lisbon

I am an undergraduate student from New Delhi, India and had traveled to Lisbon to attend the conference. I had an early morning flight to Lisbon from Delhi via Istanbul. At the Airport, I met Parichay who had been waiting there from his connecting flight. After flying 8000 km, we reached Lisbon. We took a taxi to the hotel and were greeted there by one of my Google Summer of Code mentors, Oleg. After four months of working with him on my GSoC project, meeting him was an amazing experience. Later that day, after stretching our legs in the hotel, we met Long for an early dinner, who came to the hotel after exploring much of Lisbon.

Day 1: Hackfest, December 2

A photo from the HackFest

Next morning, we all met for breakfast where we all got to taste some Pastel de Nata. We then took a cab to the Congress Centre for attending the Jenkins and Jenkins X hackfest. At the Hackfest, I met Mark, Joseph, Kasper, Andrey and other Jenkins contributors. I also met Oleg, this time together with his son and his wife. After our introductions, and a short presentation by Oleg, I started hacking on the Folder Auth plugin and made it possible to delete user sids from roles. The best part of hacking there was to get instant feedback on what I was working on. More and more people kept coming throughout the day. It was great to see so many people working hard to improve Jenkins. At the end, everyone presented what they had achieved that day. Having skipped lunch for some snacks, Oleg and others tried hard to get some pizza delivered without much success. After the Hackfest, everyone was hungry and most attendees including me went looking for nearby restaurants. Since it was early and most restaurants were not open yet, we all decided to have burgers. It was a great learning experience listening to and talking about Jenkins, Elasticsearch, Jira, GitHub and a lot of other things. After that, we took a taxi back to the hotel and I went to bed.

Sunset outside the conference center

Day 2: Contributor Summit, December 3

We had the Jenkins and Jenkins X contributor summit the next day. Me and Parichay took the bus to the Congress Centre in the morning. After registration, I got my ‘Speaker’ badge and the conference T-shirt. The contributor summit took place in the same hall as the Hackfest, but the seating arrangement was completely different and there were a lot more people. The summit started with everyone introducing themselves. It turned out that there were a lot of people from Munich. There were presentations and talks about all things Jenkins, Jenkins X and the Continuous Delivery Foundation by Kohsuke, Oleg, Joseph, Liam, Olivier, Wadek and others. I had no experience with Jenkins X which made the summit very interesting. After lunch, the talks were over, and everyone was free to join any session discussing various things about Jenkins. I attended the Cloud Native Jenkins and the Configuration-as-Code sessions.

The Contributor Summit
My badge

While some of the conference attendees were in the Contributor summit, the others were going through certifications and trainings. At around 5 o’clock in the evening, the summit and the trainings all got over and the expo hall was thrown open. On the entrance, there was a large stack of big DWJW bags. I did not realize why those bags were kept there. Since everyone was taking one, I took one as well. As soon as I went into the hall, I realized that those bags were for collecting swag. I had never seen anything like this where sponsors were just giving away T-shirts, stickers and other stuff. There were snacks and Kohsuke was cutting the extremely tasty 15 years of Jenkins cake. After having the cake, I went on a swag-collecting spree going from one sponsor booth to the other. This was an amazing experience, not only was I able to get cool stuff, I was also able to learn a lot about the software these companies made and how it fits into the DevOps pipeline.

Photo with Oleg

After the conference got over, me, Long and Parichay went to the Lisbon Mariott Hotel for the Eurodog party. After collecting another T-shirt, I went to the nearest restaurant (McDonald’s) with Andrey who I had earlier met at the Hackfest.

Kohsuke cutting cake
Photo with Kohsuke
Photo with Oleg and Joseph

Day 3: December 4

This was the first official day of the conference and it began with the keynote. There were over 900 people in the keynote hall. It was amazing to see so many people attending the conference. After the keynote got over, I went to several sessions throughout the day learning about how companies are using Jenkins and implementing DevOps tools.

15 years of Jenkins

In the evening, we had the Sonatype Superparty which was a lot of fun. There were neon lights, arcade machines, VR experiences, superheroes and more swag. There was a lot of good food including pizzas and burgers and hot dogs. Superhero inspired desserts were very interesting. I was able to talk to Oleg and Wadek about the security challenges in Jenkins. During the party, I also got a chance to meet the CEO of Cloudbees, Sacha Labourey.

Batman vs Superman
A photo with Bumblebee

Day 4, December 5

This was the last day of the conference and it began with another keynote. After the keynote, I attended a very interesting talk on how the European Observatory built software for large telescopes using Jenkins. After that, I prepared for my talk on the work I did during Google Summer of Code 2019. I had my presentation in the community booth during the lunch time. Presenting in front of real people was an amazing experience and very different from the ones we had on Zoom chats for our GSoC evaluations. In the evening, I got another chance to present my project at the Jenkins Community Lightning Talks.

Me speaking at the community booth
Me speaking at the community lightining talks

After that, the conference came to an end and I went back to the hotel. After relaxing for some time, me, Parichay and Long were invited by Oleg to a dinner at Corinthia Hotel with Kohsuke, Mark and his wife, Tracy, Alyssa, and Liam. Unfortunately, Long couldn’t attend the dinner because he had the flight back earlier that evening. After the amazing dinner, I thanked everyone for such an amazing trip and said goodbye.

GSoC Group Photo

DWJW was the best experience I’ve ever had. I was able to learn about a lot of new things and talk to some amazing people. In the end, I would like to especially thank Oleg for helping me throughout and making it possible for me to attend such a wonderful conference. I would like to thank my other mentors Runze Xia and Supun for their support in my Google Summer of Code project. I would like to thank Google for organizing Google Summer of Code, everyone at Jenkins project for sponsoring my travel, and CloudBees for inviting me to the conference.

Looking forward to seeing you all again soon!

CI. CD. Continuous Fun.

T-Mobile and Jenkins Case Study

$
0
0

Saving Thousands of Hours and Millions of Dollars at T-Mobile with Jenkins

Most people know T-Mobile as a wireless service provider. After all, we have an international presence and we’re the third largest mobile carrier in the United States. But we’re also a technology company with new products that include our TVision Home television service, our T-Mobile Money personal banking offering, and our SyncUp Drive vehicle monitoring and roadside assistance device.

T-Mobile and Jenkins - a case study

Behind the scenes, T-Mobile is also a leader in the open source community. We have shared 35+ code repositories on GitHub — including our POET pipeline framework automation library — to help other organizations support their internal and external customers by adopting robust and intelligent practices that speed up the CI/CD cycle.

I’m a senior systems reliability engineer in T-Mobile’s system reliability engineering (SRE) unit. Our team successfully rolled out phase-1 of POET implementation to 30+ teams. This was a huge success and the plan is to scale it up to our 350 developer teams and 5,000 active users with a stable, reliable CI/CD pipeline using a combination of Jenkins and CloudBees Core running on a Kubernetes cluster.

Fewer Plugins, More Masters

We started by building a streamlined container-based pipeline infrastructure that is centrally managed and easily adaptable to development methodologies. The result frees our developer teams to focus on developing and testing applications rather than on maintaining the Jenkins environment.

We then reduced the number of Jenkins plugins we use in our master from 200 to four. There are over 1,000 such add-ons, including build tools, testing utilities and cloud-integration resources. They are an excellent way to extend the platform, but they are also the Achilles' heel of Jenkins because they can cause conflicts.

Next, we moved from a single master powering all our Jenkins slaves to multiple masters, and now have 30 pipeline engines powering roughly 10 teams each. This setup has reduced CPU loads and other bottlenecks while allowing T-Mobile’s DevOps teams to continue enjoying the benefits of horizontal scaling.

Spinning-Up Jenkins Pipelines in Two Minutes

As a result of this work, my SRE team can now spin up a Jenkins master from a Docker image in roughly two minutes, test it and roll it out to our production environment. Individual teams can then customize their CI/CD pipelines to meet the needs of specific projects. We allow these teams to extend the platform, but we have restricted the list of add-ons to 16 core plugins. These plugins are preconfigured in a Docker container, and every team starts with an identical CI/CD pipeline, which they can then set up to their liking at the folder level.

This streamlined and centralized approach to deploying our pipeline allows the SRE team to put everything in motion and then get out of the way. But that’s only half the story. The real magic happens when our developer teams take ownership of the simplified CI/CD pipelines. They no longer have to worry about the underlying Jenkins technology and can shift their attention to on-boarding their solutions.

The POET Pipeline minimizes the need for Jenkins Groovy code, which is cumbersome, error-prone and difficult to incorporate into third-party libraries. Instead, everything starts with pipeline definition files located within the pipeline source code and step containers are created to perform builds, deployments and other pipeline functions.

We include 40 generic containers in the POET Pipeline, so our developers don’t have to start from scratch. Of course, they have to know how to create Docker containers and how to write a YAML file to extend the pipeline functionalities. By simplifying the infrastructure, keeping plugins to a minimum and eliminating the need for Groovy, we’ve given our developers the freedom to define their own pipelines without having to depend on a centralized management team.

Our Developers Are No Longer Infrastructure Engineers

To further empower our developers, we’ve authored comprehensive POET Pipeline documentation, including easy-to-understand help files, tutorials and videos for self-guided learning and self-service support. This valuable resource also frees up our pipeline management team and our developers to concentrate on innovation.

This documentation is part of the "customer-focused" approach we’ve adopted. We treat our internal development teams as our customers, and the POET Pipeline is our product. Can you imagine T-Mobile asking subscribers to rebuild their smartphones every time they make a call? Or making them talk to a CSR before sending a text message? Then why should we ask our developers to serve double duty as infrastructure engineers?

Reducing Downtime

On top of keeping developers happy and simplifying management tasks, our streamlined POET Pipeline framework has dramatically reduced downtime. Our plugin-heavy, single-master Jenkins environment hogged CPU cycles, caused all kinds of configuration headaches and was constantly going down.

On any given week, we had to restart Jenkins two or three times. Sometimes, our builds put such a strain on our environment that we had to restart it overnight and reset everything when our teams weren’t working. With POET Pipeline, we’ve reduced downtime to a single such incident per year.

Scaling Our Successes

By eliminating the need for a pipeline specialist on every development team, we have also incurred substantial labor and cost savings as a result of our work with Jenkins and CloudBees Core. When you consider a typical work year of 2,000 hours and multiply that by 350 teams, you’re looking at hundreds of thousands of hours and tens of millions of dollars. We can now redirect these resources into and to building revenue-generating products to better serve T-Mobile’s external customers.

These numbers are huge, but don’t let them fool you into thinking that the POET Pipeline is not for you. We may have hundreds of teams and thousands of developers, but Jenkins is scalable, and any size organization can use the tools we’ve developed. That’s why we’ve chosen to share our pipeline with the open source community on GitHub.

Innovating with the World

Innovation does not occur in a vacuum. By putting our code out there for others to use and modify, we are helping developers around the world shift their focus from managing pipelines to building better applications. In turn, we benefit by applying the wisdom of the wider community to our internal projects.

Everyone wins, but the real winners are T-Mobile’s customers. They can look forward to new and improved offerings because we’re spending less time managing our pipeline framework and more time delivering the products and services that simplify and enhance their lives.

My DevOps World | Jenkins World Lisbon Experience

$
0
0

After an amazing three months of development period in the summer of 2019 with Jenkins Project, I was a better developer, loved open source, met passionate people and had fun at work. Jenkins is not just a community, it is a family. When GSoC period was over, we received swags from Jenkins.Natasha Stopa (one of the students in GSoC 2019) was invited to attend DevOps World | Jenkins World San Francisco. It was nice to see her enjoy there. But guess what? Jenkins also invited three other students (Abhyudaya, Long and me) to DevOps World | Jenkins World Lisbon. I was super psyched when Marky Jackson (one of my project mentors) broke the news to me.

The trip to Lisbon required to sort a few things like flight tickets, hotel booking, passport, visa etc. Oleg Nenashev had scheduled meetings to discuss and help us with arranging everything for our travel. Thanks to him. :)

From India to Lisbon (Dec 1)

Abhyudaya and I boarded our flight from Indira Gandhi Airport (New Delhi) to Lisbon on December 1, 2019 morning at 0500 hours (local time). It was a fine trip with an hour layover in Istanbul Ataturk Airport. We arrived in Lisbon at 1500 hours (local time). The weather in Lisbon was terrific. A mild cold but strong sea breeze was the starting point of me falling in love with the place. We arrived at our hotel (Novotel Lisboa) in an Uber. Oleg met us at the lobby to help us with check-in. It was great to finally meet him in person after months of knowing and working together. We had a good chat about the event, what to expect and other sightseeing areas. After a short time of refresh, Long who traveled from Berlin a day before met us at the restaurant. We had a brief chat knowing each other, had our food and went to bed. The next day was Hackfest. We hit the bed after that as we had to reach Centro de Congressos de Lisboa (CCL) where the event was organised by 0900 hours.

Day 0 (Dec 2)

I woke up early for a short jog in the streets. Lisbon is a city made on hills. The streets have beautiful mosaic styled pavements. It was nice to see around the city. Then Abhyudaya and me went for breakfast and reached CCL in an Uber at 0815 hours.

A picture with Oleg Nenashev

There was a round table sitting arrangement in an auditorium. It was like a meet-and-greet event to interact with other developers (some known and some new). Everybody had to figure out their problem statements and work on it. There was milk, juice, sandwiches which gave us energy throughout the day. I took a small break to come out of the building to go to the other side of the road which was on the banks of Tagus River. From there you could have very close view underneath the Ponte 25 de Abril (looks strikingly similar to Golden Gate Bridge). You can also see The Sanctuary of Christ the King on the other side of the river (again looks similar to Christ the Redeemer in Rio, Brazil). It was great to kick off the event with Hackfest. At the end of Hackfest some of us presented our work. Later, we went to a nearby restaurant to have burgers which apparently was the best burger I ever had (could be because I hadn’t tried too many burgers before :P). We talked and interacted with people from other parts of the world for about an hour and a half then went back to our hotel rooms.

Outside CCL

Day 1 (Dec 3)

The conference officially began on this day. Abyudaya and me had breakfast and took the shuttle to CCL. We collected our t-shirts and IDs. The event managing team made an app for DevOps World | Jenkins World (DWJW) Lisbon with all schedules and other informations which was incredibly convenient for all attendees. There were multiple sessions/events on different topics related to Jenkins or DevOps in general. I attended the Jenkins and Jenkins X contributor summit. Had a nice lunch and went around to explore Lisbon. I went to Padrao dos Descobrimentos and the beautiful Belem Palace. Had some Pasteis de Belem (a popular Portuguese desert). Took a tram to Praça do Comércio. It is Lisbon’s most important square. You will find lots of tourists, street bands, sea food restaurants, shops for every budget, the famous pink street and so much more. Later that evening we had a party hosted by EURODOG (European DevOps Group) at Lisboa Marriott. It was a nice party to network with developers over casual wine and beer. We later head out to a nearby Indian restaurant for Kebab and rice.

Intro to Jenkins X session

Day 2 (Dec 4)

The second day began with the opening keynote. Later went to the Jenkins X Introduction, Deploying K8s with Jenkins on GCP, Build top mobile games by King in that order. Also occasionally hitting the sponsors booth to have a chat and collect some swags. In the evening there was the superhero themed party, sponsored by Sonatype. It was probably the most fun event in the entire conference. The expo hall had an entirely different look with the party lights on, people wearing capes, fun events going around. There were artists dressed in a Bumblebee, a Batman, a Superman, a Supergirl, a Thor and more superhero costumes! I was previously made aware of the interesting parties at Jenkins World but the experience was very different. People from all over the world had come together to celebrate the 15 years of success of an open source software. After partying from 5 to 7 we went back to the hotel. I spent some time to prepare the slides for the next day’s presentation and went to bed.

A Bumblebee at Super Hero Party

Day 3 (Dec 5)

6K Jenkins World Fun Run

The third and final day of conference began with Jenkins World Fun Run. I missed the keynote for being late and other setup required for the presentation. My laptop was broken so had to do all the setup for demo on a friend’s laptop. The situation felt like a Jenkins admin under fire for a production bug. After being under pressure for a while, took a break to admire the developer comics and had a chat with the graffiti painter. During lunch it was time for the GSoC presentation at the Jenkins community booth. All our presentation went well and we also interacted with real users. Then we had the GSoC Team pic at the Jenkins community booth. Later Abhyudaya and me gave our presentation at the lightning talks as well upon Mark Waite’s request. The event concluded with emotional goodbyes.

Developer Comics
Graffiti Wall

All GSoC Students were invited for dinner at Corinthia Lisboa’s Soul Garden restaurant. The party comprised of Oleg, Mark and his lovely wife, Liam, Tracy, Alyssa and Olivier. We had a very nice conversation and I had a very delicious Bacalhau (cod fish) dish. Then bid final goodbye to everybody.

Presenting my GSoC project work
GSoC Team Picture

It was a wonderful experience in a wonderful country among wonderful people. Hats off to the management team lead by Alyssa Tong and co. An event this big was carried out without any hiccups! Everybody contributed their part to the event which made it very interactive and fun. Checkout some of my swags:

Swag from Jenkins World Lisbon

A big shout out to the Jenkins project and CloudBees for sponsoring this trip. Also thank you Jenkins and Google Summer of Code for support. :)

Validating JCasC configuration files using Visual Studio Code

$
0
0

Configuration-as-code plugin

Problem Statement: Convert the existing schema validation workflow from the current scripting language in the Jenkins Configuration as Code Plugin to a Java based rewrite thereby enhancing its readablity and testability supported by a testing framework for the same. Enhance developer experience by developing a VSCode Plugin to facilitate autocompletion and validation which would help the developer write correct yaml files before application to a Jenkins Instance.

The Configuration as Code plugin has been designed as an opinionated way to configure Jenkins based on human-readable declarative configuration files. Writing such a file should be feasible without being a Jenkins expert, just translating into code a configuration process one is used to executing in the web UI. The plugin uses a schema to verify the files being applied to the Jenkins instance.

With the new JSON Schema being enabled developers can now test their yaml file against it. The schema checks the descriptors i.e. configuration that can be applied to a plugin or Jenkins core, the correct type is used and help text is provided in some cases. VSCode allows us to test out the schema right out of the box with some modifications. This project was built as part of the Community Bridge initiative which is a platform created by the Linux Foundation to empower developers — and the individuals and companies who support them — to advance sustainability, security, and diversity in open source technology. You can take a look at the Jenkins Community Bridge Project Page

Steps to Enable the Schema Validation

a) The first step includes installing the JCasC Plugin for Visual Studio Code and opening up the extension via the extension list. Shortcut for opening the extension list in VSCode editor using Ctrl + Shift + X.

b) In order to enable validation we need to include it in the workspace settings. Navigate to File and then Preference and then Settings. Inside settings search for json and inside settings.json include the following configuration.

{"yaml.schemas": {"schema.json": "y[a]?ml"
    }
}

You can specify a glob pattern as the value for schema.json which is the file name for the schema. This would apply the schema to all yaml files. eg: .[y[a]?ml]

c) The following tasks can be done using VSCode:

a) Auto completion (Ctrl + Space):
  Auto completes on all commands.
b) Document Outlining (Ctrl + Shift + O):
Provides the document outlining of all completed nodes in the file.

d) Create a new file under the work directory called jenkins.yml. For example consider the following contents for the file:

jenkins:systemMessage: “Hello World”numExecutors: 2
  1. The above yaml file is valid according to the schema and vscode should provide you with validation and autocompletion for the same.

Screenshots

vscodeuserDocs1userDocs2

We are holding an online meetup on the 26th February regarding this plugin and how you could use it to validate your YAML configuration files. For any suggestions or dicussions regarding the schema feel free to join our gitter channel. Issues can be created on Github.


Pipeline-Authoring SIG Update

$
0
0

What is the Pipeline-Authoring Special Interest Group

This special interest group aims to improve and curate the experience of authoring Jenkins Pipelines. This includes the syntax of `Jenkinsfile`s and shared libraries, code sharing and reuse, testing of Pipelines and shared libraries, IDE integration and other development tools, documentation, best practices, and examples.

What Are The Focus Areas of the Pipeline-Authoring Special Interest Group

  • Syntax - How `Jenkinsfile`s and shared libraries are written.

  • Code sharing and reuse - Shared libraries and future improvements.

  • Testing - Unit and functional testing of `Jenkinsfile`s and shared libraries.

  • IDE integration, editors, and other development tools - IDE plugins, visual editors, etc.

  • Documentation - Reference documentation, tutorials, and more.

  • Best practices - Defining, maintaining, and evangelizing best practices in Jenkins Pipeline.

  • Examples - Real-world `Jenkinsfile`s and shared libraries demonstrating how to utilize various features of Pipeline, as well as basic or starter `Jenkinsfile`s for common patterns that can be used as jumping-off points by new users.

What Have We Been Up To

With the start of a new year, members got together to discuss the roadmap for 2020. During the initial discussions we determined that it would be good to examine the goals of previous meetings and determine the best path forward.

A mutual decision was made that to better create a roadmap; we needed to understand better who we were aiming to help. We decided that creating personas was very beneficial. Personas are fictional characters, which we are creating based upon our research to represent the different user types that might use Jenkins pipelines. Creating personas can help us step out of ourselves. It can help us to recognize that different people have different needs and expectations, and it can also help us to identify with the user we are building the roadmap for. Personas make the task at hand less complicated, they guide our ideation processes, and they can help us to achieve the goal of creating a good user experience for our target user group. A lot of that work can be found here:https://docs.google.com/document/d/1CdyzJwt50Wk3uUNsLMl2d4w2MGYss-phqet0s-KjbEs/edit The idea is to map the personas to a maturity model and then map the maturity model to the actual documentation. That maturity model can be found here: https://drive.google.com/file/d/1ByzWlPU0j1qM_gqspJppkNKkR5ZVLWlB/view

How Can I Get Involved

We have been meeting regularly to define personas to help us better create the SIG roadmap. We meet twice a week, once on Thursday for the EMEA timezone and once on Friday for the US timezone. Meeting notes can be found here:https://docs.google.com/document/d/1EhWoBplGl4M8bHz0uuP-iOynPGuONjcz4enQm8sDyUE/edit# and the calendar, if you would like to attend, is here: https://jenkins.io/event-calendar/. The previous recording of the meetings are located here: https://www.youtube.com/watch?v=pz_kPpb9C1w&list=PLN7ajX_VdyaOKKLBXek6iG8wTS24Ac7Y3

Next Steps

We have a lot of work to do and could use your help. If you would love to join us, check out the meeting link. If you would like to check out the personas and give feedback, also check out the link. Once we have wrapped up the personas work, we will start to identify the available documentation and ensure we have adequate documentation with the help of the Doc SIG. We will finally then start working to build out tools to help the community with pipelines in Jenkins better.

Findsecbugs for Developers

$
0
0

Spotbugs is a utility used in Jenkins and many other Java projects to detect common Java coding mistakes and bugs. It is integrated into the build process to improve the code before it gets merged and released. Findsecbugs is a plugin for Spotbugs that adds 135 vulnerability types focused on the OWASP TOP 10 and the Common Weakness Enumeration (CWE). I’m working on integrating findsecbugs into our Jenkins ecosystem.

Background

Spotbugs traces its history through Findbugs, which started in 2006. As Findbugs it was widely adopted by many projects. About 2016, the Findbugs project ground to a halt. Like the mythical phoenix, the Spotbugs project rose from the ashes to keep the capabilities alive. Most things are completely compatible between the two systems.

Jenkins has used Findbugs and now Spotbugs for years. This is integrated as a build step into parent Maven poms, including the plugin parent pom and the parent pom for libraries and core components. There are various properties that can be set to control the detection threshold, the effort, and findings or categories to exclude. Take a look at the effective pom for a project to see the settings.

Conundrums

There is a fundamental conundrum with introducing an analysis tool into a project. The best time to have done it is always in the past, particularly when the project first started. There are always difficulties in introducing it into an existing project. Putting it off for later just delays the useful results and makes later implementation more difficult. The best time to do it is now, as early as possible.

All analysis tools are imperfect. They report some issues that don’t actually exist. They miss some important issues. This is worse in legacy code, making the adoption more difficult. Findings have to be examined and evaluated. Some are code weaknesses but don’t indicate necessary fixes. For example, MD5 has been known for years as a weak algorithm, unsuitable for security uses. It can be used for non-security purposes, such as fingerprinting, but even there other algorithms (SHA-2) are preferred. We should replace all usages of MD5, but in some cases that’s difficult and it’s not exactly a problem.

Ultimately, the gain from these analysis tools isn’t so much from finding issues in existing code. The value comes more from catching new regressions that might be introduced or improving new code. This is one reason why it is valuable to add useful new analysis such as findsecbugs now, so that we can begin reaping the benefits.

With a security tool like findsecbugs, there is another paradox. Adding the tool makes it easier to find potential security issues. Attackers could take advantage of this information. However, security by obscurity is not a good design. Anyone can run findsecbugs now without the project integrating it. Integrating it makes it easier for legitimate developers to resolve issues and prevent future ones.

Implementation

I’ve been working on integrating findsecbugs into the Jenkins project for several months. It is working in several repos. There are several others where I have presented draft PRs to demonstrate what it will look like once it is enabled. As soon as we can disseminate the information enough, I propose to enable it in the parent poms for widespread use.

Existing

I started by enabling findsecbugs in two major components where I have a high degree of familiarity, Remoting, and Jenkins. Most of the work here involves examining each finding and figuring out what to do with it. In most cases this results in using one of the suppression mechanisms to ignore the finding. In some cases, the code can be removed or improved.

Findsecbugs reported a significant number of false positives in Remoting for a couple of notable reasons. (See the PR.) Remoting uses Spotbugs aggressively with a Low threshold setting. This produces more results. Findsecbugs targets Java web applications. As the communication layer between agents and master, Remoting uses some mechanisms that would be a problem on the server side but are acceptable on the agent.

Even without all its plugins, Jenkins is a considerable collection of code. Findsecbugs reported a smaller number of false positives for Jenkins (See the PR.) It runs Spotbugs at a High threshold, so it only reports issues it deems more concerning. A number of these indicate code debt, deprecated code to remove, or areas that could be improved. I created Jira tickets for many of these.

Demonstrated

I have created draft PRs to demonstrate how findsecbugs will look in several plugins. The goal is not to use these PRs directly but instead integrate findsecbugs at the parent pom level. These PRs serve as reference documentation.

Credentials

This one is particularly interesting because here findsecbugs correctly detects the remains of a valid security vulnerability (CVE-2019-10320). Currently, this code is safely used only for migration of old data. If we had run findsecbugs on this plugin a year ago, it would have detected this valid vulnerability.

SSH Build Agents

This one is interesting because it flags MD5 as a concern. Since it is used for fingerprinting, it isn’t a valid vulnerability, but since the hash isn’t stored it is easy to improve the code here.

EC2

In this case, findsecbugs found some valid concerns, but the code isn’t used so it can be removed. Also, MD5 is harder to remove here but should be considered technical debt and removed when possible.

Platform Labeler

Findsecbugs didn’t find any concerns here. This means adapting to it requires no work. In this demonstration, I added a fake finding to prove that it was working.

File Leak Detector

There is one simple finding noted here. Because it is part of the configuration performed by an administrator we can ignore it.

Credentials Binding

Nothing was found here so integration requires no effort.

Proposed

My proposal is to integrate findsecbugs configuration into the parent poms as soon as we can. The delay is currently mostly around sharing the information to prepare developers by blog post, email list discussion, and presentation.

Even before I started working on this, StefanSpieker proposed a PR to integrate into the parent Jenkins pom. This will apply to Jenkins libraries and core components. Once this is integrated, I will pull out the changes I made to the Jenkins and Remoting project poms.

I also plan on integrating findsecbugs into the plugin and Stapler parent poms. Once it is added to the plugin parent pom all plugins will automatically perform these checks when they upgrade their parent pom version. If there are any findings, developers will need to take care of them as described in the next section.

What do you need to do?

Once developers upgrade to a parent pom version that integrates findsecbugs, they may have to deal with evaluating, fixing, or suppressing findings. The parent pom versions do not yet exist but are in process or proposed.

Extraneous build message

In some cases, an extraneous message may show up in the build logs. It starts with a line like this The following classes needed for analysis were missing: followed by lines listing some methods by name. Ignore this message. It results from SpotBugs printing some internal, debug information that isn’t helpful here.

Examine findings

If findsecbugs reports any findings, then a developer needs to examine and determine what to do about each one.

Excluding issues

You can exclude an issue, so that it is never reported in a project. This is done by configuring an exclusion file. If you encounter the findings CRLF_INJECTION_LOGS or INFORMATION_EXPOSURE_THROUGH_AN_ERROR_MESSAGE feel free to add these to an exclusion file. These are not considered a concern in Jenkins. See the Jenkins project exclusion file for an example. You should be cautious about including other issue types here.

Temporarily disable findsecbugs

You may disable findsecbugs by adding <Bug category="SECURITY"/> to the exclusion file. I strongly encourage you to only disable findsecbugs temporarily when genuinely needed.

Suppress a finding

After determining that a finding is not important, you can suppress it by annotating a method or a class with @SuppressFBWarnings(value = “…​”, justification=”…​”). I encourage you to suppress narrowly. Never suppress at the class level when you can add it to a method. For a long method, extract the problematic part into a small method and add the suppression there. I also encourage you to always add a meaningful justification.

Improve code

Whenever possible improve the code such that the problematic code no longer exists. This can include removing deprecated or unused code, using improved algorithms, or improving structure or implementation. This is where the significant gains come from with SpotBugs and findsecbugs. Also, as you make changes or add new features make sure to implement them so as not to introduce new issues.

Report security vulnerabilities

If you encounter a finding related to a valid security vulnerability, please report it via the Jenkins security reporting process. This is the responsible behavior that benefits the community. Try not to discuss or call attention to the issue before it can be disclosed in a Jenkins security advisory.

Create tasks

If you discover an improvement area that is too large to fit into your current work or release plan, I encourage you to record a task to get it done. You can do this in Jira, like I did for several issues in Jenkins core, or in whatever task management system you use.

Conclusion

SpotBugs has long been used in Jenkins to catch bugs and improve code quality. Findsecbugs adds valuable security-related bug definitions. As we integrate it into the existing Jenkins code base it will require analysis and suppression for legacy code. This identifies areas we can improve and enhances quality as we move forward. Please responsibly report any security vulnerabilites you discover.

Hands On: Beautify the user interface of Jenkins reporter plugins

$
0
0

For Jenkins a large number of plugins are available that visualize the results of a wide variety of build steps. There are plugins available to render the test results, the code coverage, the static analysis and so on. All of these plugins typically pick up the build results of a given build step and show them in the user interface. In order to render these details most of the plugins use static HTML pages, since this type of user interface is the standard visualization in Jenkins since its inception in 2007.

In order to improve the look and feel and the user experience of these plugins it makes sense to move forward and incorporate some modern Java Script libraries and components. Since development of Blue Ocean has been stopped (seeJenkins mailing list post) plugin authors need to decide on their own, which UI technologies are helpful for that task. However, the universe of modern UI components is so overwhelming that it makes sense to pick up only a small set of components that are proven to be useful and compatible with Jenkins underlying web technologies. Moreover, the initial setup of incorporating such a new component is quite large so it would be helpful if that work needs to be done only once.

This guide introduces a few UI components that make sense to be used by all plugin authors in the future to provide a rich user interface for reports in Jenkins. In order to simplify the usage of these libraries in the context of Jenkins as a Java based web application, these Java Script libraries and components have been packaged as ordinary Jenkins plugins.

In the following sections, these new components will be introduced step by step. In order to see how these components can be used a plugin, I demonstrate the new features while enhancing the existingForensics Plugin with a new user interface. Since the Warnings Next Generation Plugin also uses these new components, you can see additional examples in the documentation of the warnings plugin or in our public ci.jenkins.io instance, that already is using these components in the detail views of the warnings plugin.

1. New user interface plugins

The following UI components are provided as new Jenkins plugins:

  • jquery3-api-plugin: Provides jQuery 3 for Jenkins Plugins. jQuery is — as described on their home page — a fast, small, and feature-rich JavaScript library. It makes things like HTML document traversal and manipulation, event handling, animation, and Ajax much simpler with an easy-to-use API that works across a multitude of browsers. With a combination of versatility and extensibility, jQuery has changed the way that millions of people write JavaScript.

  • bootstrap4-api-plugin: Provides Bootstrap 4 for Jenkins Plugins. Bootstrap is — according to their self-perception — the world’s most popular front-end component library to build responsive, mobile-first projects on the web. It is an open source toolkit for developing with HTML, CSS, and JS. Developers can quickly prototype their ideas or build entire apps with their Sass variables and mixins, responsive grid system, extensive prebuilt components, and powerful plugins built on jQuery.

  • data-tables-api-plugin: Provides DataTables for Jenkins Plugins. DataTables is a plug-in for the jQuery Javascript library. It is a highly flexible tool, built upon the foundations of progressive enhancement, that adds all of these advanced features to any HTML table:

    • Previous, next and page navigation

    • Filter results by text search

    • Sort data by multiple columns at once

    • DOM, Javascript, Ajax and server-side processing

    • Easily theme-able

    • Mobile friendly

  • echarts-api-plugin: Provides ECharts for Jenkins Plugins. ECharts is an open-sourced JavaScript visualization tool to create intuitive, interactive, and highly-customizable charts. It can run fluently on PC and mobile devices and it is compatible with most modern Web Browsers.

  • font-awesome-api-plugin: Provides Font Awesome for Jenkins Plugins. Font Awesome has vector icons and social logos, according to their self-perception it is the web’s most popular icon set and toolkit. Currently, it contains more than 1,500 free icons.

  • popper-api-plugin Provides Popper.js for Jenkins Plugins. Popper can easily position tooltips, popovers or anything else with just a line of code.

  • plugin-util-api-plugin: This small plugin provides some helper and base classes to simplify the creation of reporters in Jenkins. This plugin also provides a set of architecture rules that can be included in an architecture test suite of your plugin.

2. Required changes for a plugin POM

In order to use these plugins you need to add them as dependencies in your plugin pom. You can use the following snippet to add them all:

pom.xml
<project>

 [...]

  <properties><plugin-util-api.version>1.0.2</plugin-util-api.version><font-awesome-api.version>5.12.0-7</font-awesome-api.version><bootstrap4-api.version>4.4.1-10</bootstrap4-api.version><echarts-api.version>4.6.0-8</echarts-api.version><data-tables-api.version>1.10.20-13</data-tables-api.version>
    [...]</properties><dependencies><dependency><groupId>io.jenkins.plugins</groupId><artifactId>plugin-util-api</artifactId><version>${plugin-util-api.version}</version></dependency><dependency><groupId>io.jenkins.plugins</groupId><artifactId>font-awesome-api</artifactId><version>${font-awesome-api.version}</version></dependency><dependency><groupId>io.jenkins.plugins</groupId><artifactId>bootstrap4-api</artifactId><version>${bootstrap4-api.version}</version></dependency><dependency><groupId>io.jenkins.plugins</groupId><artifactId>echarts-api</artifactId><version>${echarts-api.version}</version></dependency><dependency><groupId>io.jenkins.plugins</groupId><artifactId>data-tables-api</artifactId><version>${data-tables-api.version}</version></dependency>
    [...]</dependencies>

  [...]

</project>

Alternatively, you have a look at the POM files of theWarnings Next Generation Plugin or theForensics API Plugin which already use these plugins.

3. General structure of a reporter

In this section I will explain some fundamentals of the design of Jenkins, i.e. the Java model and the associated user interface elements. If you are already familiar on how to implement the corresponding extension points of a reporter plugin (see section Extensibility in Jenkins' developer guide), then you can skip this section and head directly to Section 3.1.

Jenkins organizes projects using the static object model structure shown in Figure 1.

Jenkins design
Figure 1. Jenkins design - high level view of the Java model

The top level items in Jenkins user interface are jobs (at least the top level items we are interested in). Jenkins contains several jobs of different types (Freestyle jobs, Maven Jobs, Pipelines, etc.).

Each of these jobs contains an arbitrary number of builds (or more technically, runs). Each build is identified by its unique build number. Jenkins plugins can attach results to these builds, e.g. build artifacts, test results, analysis reports, etc. In order to attach such a result, a plugin technically needs to implement and create an action that stores these results.

These Java objects are visualized in several different views, which are described in more detail in the following sections. The top-level view that shows all available Jobs is shown in Figure 2.

Jobs
Figure 2. Jenkins view showing all available jobs

Plugins can also contribute UI elements in these views, but this is out of scope of this guide.

Each job has a detail view, where plugins can extend corresponding extension points and provide summary boxes and trend charts. Typically, summary boxes for reporters are not required on the job level, so I describe only trend charts in more detail, see section Section 5.5.2.

Job details
Figure 3. Jenkins view showing details about a job

Each build has a detail view as well. Here plugins can provide summary boxes similar to the boxes for the job details view. Typically, plugins show here only a short summary and provide a link to detailed results, see Figure 4 for an example.

Build details
Figure 4. Jenkins view showing details about a build

The last element in the view hierarchy actually is a dedicated view that shows the results of a specific plugin. E.g., there are views to show the test results, the analysis results, and so on. It is totally up to a given plugin what elements should be shown there. In the next few sections I will introduce some new UI components that can be used to show the corresponding results in a pleasant way.

3.1. Extending Jenkins object model

Since reporters typically are composed in a similar way, I extended Jenkins' original object model (see Figure 1) with some additional elements, so it will be much simpler to create or implement a new reporter plugin. This new model is shown in Figure 5. The central element is a build action that will store the results of a plugin reporter. This action will be attached to each build and will hold (and persist) the results for a reporter. The detail data of each action will be automatically stored in an additional file, so the memory footprint of Jenkins can be kept small if the details are never requested by users. Additionally, this action is also used to simplify the creation of project actions and trend charts, see Section 5.5.2.

Jenkins reporter design
Figure 5. Jenkins reporter design - high level view of the model for reporter plugins

4. Git Forensics plugin

The elements in this tutorial will be all used in the newForensics API Plugin (actually the plugin is not new, it is a dependency of theWarnings Next Generation Plugin). You can download the plugin content and see in more detail how these new components can be used in practice. Or you can change this plugin just to see how these new components can be parametrized.

If you are using Git as source code management system then this plugin will mine the repository in the style ofCode as a Crime Scene (Adam Tornhill, November 2013) to determine statistics of the contained source code files:

  • total number of commits

  • total number of different authors

  • creation time

  • last modification time

The plugin provides a new step (or post build publisher) that starts the repository mining and stores the collected information in a Jenkins action (see Figure 5). Afterwards you get a new build summary that shows the total number of scanned files (as trend and as build result). From here you can navigate to the details view that shows the scanned files in a table that can be simply sorted and filtered. You also will get some pie charts that show important aspects of the commit history.

Please note that this functionality of the plugin still is a proof of concept: the performance of this step heavily depends on the size and the number of commits of your Git repository. Currently it scans the whole repository in each build. In the near future I hope to find a volunteer who is interested in replacing this dumb algorithm with an incremental scanner.

5. Introducing the new UI components

As already mentioned in Section 3, a details view is plugin specific. What is shown and how these elements are presented is up to the individual plugin author. So in the next sections I provide some examples and new concepts that plugins can use as building blocks for their own content.

5.1. Modern icons

Jenkins plugins typically do not use icons very frequently. Most plugins provide an icon for the actions and that’s it. If you intend to use icons in other places, plugin authors are left on their own: the recommended Tango icon set is more than 10 years old and too limited nowadays. There are several options available, but the most popular is the Font Awesome Icon Set. It provides more than 1500 free icons that follow the same design guidelines:

Font Awesome icons
Figure 6. Font Awesome icons in Jenkins plugins

In order to use Font Awesome icons in a plugin you simply need a dependency to the correspondingfont-awesome-api-plugin. Then you can use any of the solid icons by using the new tag svg-icon in your jelly view:

index.jelly
1
2
3
4
5
6
7
<j:jellyxmlns:j="jelly:core"xmlns:st="jelly:stapler"xmlns:l="/lib/layout"xmlns:fa="/font-awesome">

  [...]
  <fa:svg-iconname="check-double"class="no-issues-banner"/>
  [...]</j:jelly>

If you are generating views using Java code, then you also can use the class SvgTag to generate the HTML markup for such an icon.

5.2. Grid layout

Jenkins currently includes in all views an old and patched version of Boostrap’s grid system (with 24 columns). This version is not compatible with Boostrap 4 or any of the JS libraries that depend on Bootstrap4. In order to use Bootstrap 4 features we need to replace the Jenkins provided layout.jelly file with a patched version, that does not load the broken grid system. I’m planning to create a PR that fixes the grid in Jenkins core, but that will take some time. Until then you will need to use the provided layout.jelly of the Boostrap4 plugin, see below.

The first thing to decide is, which elements should be shown on a plugin page and how much space each element should occupy. Typically, all visible components are mapped on the available space using a simple grid. In a Jenkins view we have a fixed header and footer and a navigation bar on the left (20 percent of the horizontal space). The rest of a screen can be used by a details view. In order to simplify the distribution of elements in that remaining space we useBootstrap’s grid system.

Grid layout in Jenkins
Figure 7. Jenkins layout with a details view that contains a grid system

That means, a view is split into 12 columns and and arbitrary number of rows. This grid system is simple to use (but complex enough to also support fancy screen layouts) - I won’t go into details here, please refer to the Bootstrap documentation for details.

For the forensics detail view we use a simple grid of two rows and two columns. Since the number of columns always is 12 we need to create two "fat" columns that fill 6 of the standard columns. In order to create such a view in our plugin we need to create a view given as a jelly file and a corresponding Java view model object. A view with this layout is shown in the following snippet:

index.jelly
1
2
3
4
5
6
7
8
9
10
11
12
13
14
15
16
17
18
19
20
21
22
23
24
25
26
27
28
<?jelly escape-by-default='true'?><j:jellyxmlns:j="jelly:core"xmlns:st="jelly:stapler"xmlns:l="/lib/layout"xmlns:bs="/bootstrap"><bs:layouttitle="${it.displayName}"norefresh="true">(1)<st:includeit="${it.owner}"page="sidepanel.jelly"/><l:main-panel><st:adjunctincludes="io.jenkins.plugins.bootstrap4"/>(2)<divclass="fluid-container">(3)<divclass="row py-3">(4)<divclass="col-6">(5)
            Content of column 1 in row 1</div><divclass="col-6">(6)
            Content of column 2 in row 1</div></div><divclass="row py-3">(7)<divclass="col">(8)
            Content of row 2</div></div></div></l:main-panel></bs:layout></j:jelly>
1Use a custom layout based on Bootstrap: since Jenkins core contains an old version of Bootstrap, we need to replace the standard layout.jelly file.
2Import Bootstrap 4: Importing of JS and CSS components is done using the adjunct concept, which is the preferred way of referencing static resources within Jenkins' Stapler Web framework.
3The whole view will be placed into a fluid container that fills up the whole screen (100% width).
4A new row of the view is specified with class row. The additional class py-3 defines the padding to use for this row, see Bootstrap Spacing for more details.
5Since Bootstrap automatically splits up a row into 12 equal sized columns we define here that the first column should occupy 6 of these 12 columns. You can also leave off the detailed numbers, then Bootstrap will automatically distribute the content in the available space. Just be aware that this not what you want in most of the times.
6The second column uses the remaining space, i.e. 6 of the 12 columns.
7The second row uses the same layout as row 1.
8There is only one column for row 1, it will fill the whole available space.

You can also specify different column layouts for one row, based on the actual visible size of the screen. This helps to improve the layout for larger screens. In the warnings plugin you will find an example: on small devices, there is one card visible that shows one pie chart in a carousel. If you are opening the same page on a larger device, then two of the pie charts are shown side by side and the carousel is hidden.

5.3. Cards

When presenting information of a plugin as a block, typically plain text elements are shown. This will normally result in some kind of boring web pages. In order to create a more appealing interface, it makes sense to present such information in a card, that has a border, a header, an icon, and so on. In order to create such aBootstrap card a small jelly tag has been provided by the newBootstrap plugin that simplifies this task for a plugin. Such a card can be easily created in a jelly view in the following way:

1
2
3
<bs:cardtitle="${%Card Title}"fontAwesomeIcon="icon-name">
  Content of the card</bs:card>

In Figure 8 examples of such cards are shown. The cards in the upper row contain pie charts that show the distribution of the number of authors and commits in the whole repository. The card at the bottom shows the detail information in a DataTable. The visualization is not limited to charts or tables, you can show any kind of HTML content in there. You can show any icon of your plugin in these cards, but it is recommended to use one of the existing Font Awesome icons to get a consistent look and feel in Jenkins' plugin ecosystem.

Card examples
Figure 8. Bootstraps cards in Jenkins plugins

Note that the size of the cards is determined by the grid configuration, see Section 5.2.

5.4. Tables

A common UI element to show plugin details is a table control. Most plugins (and Jenkins core) typically use plain HTML tables. However, if the table should show a large number of rows then using a more sophisticated control like DataTables makes more sense. Using this JS based table control provides additional features at no cost:

  • filter results by text search

  • provide pagination of the result set

  • sort data by multiple columns at once

  • obtain table rows using Ajax calls

  • show and hide columns based on the screen resolution

In order to use DataTables in a view there are two options, you can either decorate existing static HTML tables (see Section 5.4.1) or populate the table content using Ajax (see Section 5.4.2).

5.4.1. Tables with static HTML content

The easiest way of using DataTables is by creating a static HTML table that will be decorated by simply calling the constructor of the datatable. This approach involves no special handling on the Java and Jelly side, so I think it is sufficient to follow the example in the DataTables documentation. Just make sure that after building the table in your Jelly file you need to decorate the table with the following piece of code:

<j:jellyxmlns:j="jelly:core"xmlns:st="jelly:stapler"><st:adjunctincludes="io.jenkins.plugins.jquery3"/><st:adjunctincludes="io.jenkins.plugins.data-tables"/>

  [...]

    <divclass="table-responsive"><tableclass="table table-hover table-striped display"id="id">
            [...]</table></div>

  [...]
  <script>$('#id').DataTable(); (1)</script></j:jelly>
1replace id with the ID of your HTML table element

In the Forensics plugin no such static table is used so far, but you can have a look at thetable that shows fixed warnings in the warnings plugin to see how such a table can be decorated.

5.4.2. Tables with dynamic model based content

While static HTML tables are easy to implement, they have several limitations. So it makes sense to follow a more sophisticated approach. Typically, tables in user interfaces are defined by using a corresponding table (and row) model. Java Swing successfully provides such atable model concept since the early days of Java. I adapted these concepts for Jenkins and DataTables as well. In order to create a table in a Jenkins view a plugin needs to provide a table model class, that provides the following information:

  • the ID of the table (since there might be several tables in the view)

  • the model of the columns (i.e., the number, type, and header labels of the columns)

  • the content of the table (i.e. the individual row objects)

You will find an example of such a table in the Forensics plugin: here a table lists the files in your Git repository combined with the corresponding commit statistics (number of authors, number of commits, last modification, first commit). A screenshot of that table is shown in Figure 9.

Table example
Figure 9. Dynamic Table in the Forensics plugin

In order to create such a table in Jenkins, you need to create a table model class that derives from TableModel. In Figure 10 a diagram of the corresponding classes in the Forensics plugin is shown.

Tabel model
Figure 10. Table model of the Forensics plugin
Table column model

This first thing a table model class defines is a model of the available columns by creating correspondingTableColumn instances. For each column you need to specify a header label and the name of the bean property that should be shown in the corresponding column (the row elements are actually Java beans: each column will show one distinct property of such a bean, see next section). You can use any of the supported column types by simply providing aString or Integer based column.

Table rows content

Additionally, a table model class provides the content of the rows. This getRows() method will be invoked asynchronously using an Ajax call. Typically, this method simply returns a list of Java Bean instances, that provide the properties of each column (see previous section). These objects will be converted automatically to an array of JSON objects, the basic data structure required for the DataTables API. You will find a fully working example table model implementation in the Git repository of the forensics plugin in the classForensicsTableModel.

In order to use such a table in your plugin view you need to create the table in the associated Jelly file using the new table tag:

index.jelly
<j:jellyxmlns:j="jelly:core"xmlns:dt="/data-tables">
    [...]<st:adjunctincludes="io.jenkins.plugins.data-tables"/><dt:tablemodel="${it.getTableModel('id')}"/>(1)
    [...]</j:jelly>
1replace id with the id of your table

The only parameter you need to provide for the table is the model — it is typically part of the corresponding Jenkins view model class (this object is referenced with ${it} in the view). In order to connect the corresponding Jenkins view model class with the table, the view model class needs to implement the AsyncTableContentProvider interface. Or even simpler, let your view model class derive fromDefaultAsyncTableContentProvider. This relationship is required, so that Jenkins can automatically create and bind a proxy for the Ajax calls that will automatically fill the table content after the HTML page has been created.

If we put all those pieces together, we are required to define a model similar to the model of the Forensics plugin, that is shown in Figure 11.

Forensics view model
Figure 11. Jenkins reporter design - high level view of the model for reporter plugins

As already described in Figure 5 the plugin needs to attach a BuildAction to each build. The Forensics plugin attaches a ForensicBuildAction to the build. This action stores a RepositoryStatistics instance, that contains the repository results for a given build. This action delegates all Stapler requests to a newStapler proxy instance so we can keep the action clean of user interface code. This ForensicsViewModel class then acts as view model that provides the server side model for the corresponding Jelly view given by the file index.jelly.

While this approach looks quite complex at a first view, you will see that the actual implementation part is quite small. Most of the boilerplate code is already provided by the base classes and you need to implement only a few methods. Using this concept also provides some additional features, that are part of the DataTables plugin:

  • Ordering of columns is persisted automatically in the browser local storage.

  • Paging size is persisted automatically in the browser local storage.

  • The Ajax calls are actually invoked only if a table will become visible. So if you have several tables hidden in tabs then the content will be loaded on demand only, reducing the amount of data to be transferred.

  • There is an option available to provide an additional details row that can be expanded with a + symbol, see warnings plugin table for details.

5.5. Charts

A plugin reporter typically also reports some kind of trend from build to build. Up to now Jenkins core provides only a quite limited concept of rendering such trends as trend charts. TheJFreeChart framework offered by Jenkins core is a server side rendering engine that creates charts as static PNG images that will be included on the job and details pages. Nowadays, several powerful JS based charting libraries are available, that do the same job (well actually an even better job) on the client side. That has the advantage that these charts can be customized on each client without affecting the server performance. Moreover, you get a lot of additional features (like zooming, animation, etc.) for free. Additionally, these charting libraries not only support the typical build trend charts but also a lot of additional charts types that can be used to improve the user experience of a plugin. One of those charting libraries is ECharts: this library has a powerful API and supports literally every chart type one can image of. You can get some impressions of the features on theexamples page of the library.

In order to use these charts one can embed charts that use this library by importing the corresponding JS files and by defining the chart in the corresponding Jelly file. While that already works quite well it will be still somewhat cumbersome to provide the corresponding model for these charts from Jenkins build results. So I added a powerful Java API that helps to create the model for these charts on the Java side. This API provides the following features:

  • Create trend charts based on a collection of build results.

  • Separate the chart type from the aggregation in order to simplify unit testing of the chart model.

  • Toggle the type of the X-Axis between build number or build date (with automatic aggregation of results that have been recorded at the same day).

  • Automatic conversion of the Java model to the required JSON model for the JS side.

  • Support for pie and line charts (more to come soon).

Those charts can be used as trend chart in the project page (see Figure 3) or as information chart in the details view of a plugin (see Section 5).

5.5.1. Pie charts

A simple but still informative chart is a pie chart that illustrates numerical proportions of plugin data. In the Forensics plugin I am using this chart to show the numerical proportions of the number of authors or commits for the source code files in the Git repository (see Figure 8). In the warnings plugin I use this chart to show the numerical proportions of the new, outstanding, or fixed warnings, see Figure 12.

Pie chart example
Figure 12. Pie chart in the Warnings plugin

In order to include such a chart in your details view, you can use the provided pie-chart tag. In the following snippet you see this tag in action (embedded in a Bootstrap card, see Section 5.3):

index.jelly
1
2
3
4
5
6
7
8
9
10
<?jelly escape-by-default='true'?><j:jellyxmlns:j="jelly:core"xmlns:c="/charts"xmlns:bs="/bootstrap">

    [...]
    <bs:cardtitle="${%Number of authors}"fontAwesomeIcon="users"><c:pie-chartid="authors"model="${it.authorsModel}"height="256"/></bs:card>
    [...]</j:jelly>

You need to provide a unique ID for this chart and the corresponding model value. The model must be the JSON representation of a corresponding PieChartModel instance. Such a model can be created with a couple of lines:

ViewModel.java
1
2
3
4
5
6
7
8
9
    [...]
    PieChartModel model = new PieChartModel("Title");

    model.add(new PieData("Segment 1 name", 10), Palette.RED);
    model.add(new PieData("Segment 2 name", 15), Palette.GREEN);
    model.add(new PieData("Segment 3 name", 20), Palette.YELLOW);String json = new JacksonFacade().toJson(model);
    [...]

5.5.2. Trend charts on the job level view

In order to show a trend that renders a line chart on the job page (see Figure 3) you need to provide a so called floating box (stored in the file floatingBox.jelly of your job action (see Section 3)). The content of this file is quite simple and contains just a trend-chart tag:

floatingBox.jelly
1
2
3
4
5
6
<?jelly escape-by-default='true'?><j:jellyxmlns:j="jelly:core"xmlns:c="/charts"><c:trend-chartit="${from}"title="${%SCM Files Count Trend}"enableLinks="true"/></j:jelly>

On the Java side the model for the chart needs to be provided in the corresponding sub class of JobAction (which is the owner of the floating box). Since the computation of trend charts is quite expensive on the server side as well (several builds need to be read from disk and the interesting data points need to be computed) this process has been put into a separate background job. Once the computation is done the result is shown via an Ajax call. In order to hide these details for plugin authors you should simply derive your JobAction class from the correspondingAsyncTrendJobAction class, that already contains the boilerplate code. So your static plugin object model will actually become a little bit more complex:

Jenkins chart model
Figure 13. Jenkins chart model design

Basically, you need to implement the method LinesChartModel createChartModel() to create the line chart. This method is quite simple to implement, since most of the hard work is provided by the library: you will invoke with an iterator of your build actions, starting with the latest build. The iterator advances from build to build until no more results are available (or the maximum number of builds to consider has been reached). The most important thing to implement in your plugin is the way how data points are computed for a given BuildAction. Here is an example of such a SeriesBuilder implementation in the Forensics Plugin:

FilesCountSeriesBuilder.java
1
2
3
4
5
6
7
8
9
10
11
12
13
14
15
16
17
18
19
20
21
22
packageio.jenkins.plugins.forensics.miner;importjava.util.HashMap;importjava.util.Map;importedu.hm.hafner.echarts.SeriesBuilder;/**
 * Builds one x-axis point for the series of a line chart showing the number of files in the repository.
 *
 * @author Ullrich Hafner
 */publicclassFilesCountSeriesBuilderextends SeriesBuilder<ForensicsBuildAction> {staticfinalString TOTALS_KEY = "total";@OverrideprotectedMap<String, Integer> computeSeries(final ForensicsBuildAction current) {Map<String, Integer> series = newHashMap<>();
        series.put(TOTALS_KEY, current.getNumberOfFiles());return series;
    }
}

You are not limited to a single line chart. You can show several lines in a single chart, you can show stacked values, or even the delta between some values. You can also have a look at thecharts of the warnings plugin to see some of these features in detail.

Trend with several lines example
Figure 14. Trend chart with several lines in the Warnings plugin
Trend chart with stacked lines example
Figure 15. Trend chart with stacked lines in the Warnings plugin

Introducing the Azure Key Vault Credentials Provider for Jenkins

$
0
0

Azure Key Vault is a product for securely managing keys, secrets and certificates.

I’m happy to announce two new features in the Azure Key Vault plugin:

These changes were released in v1.8 but make sure to run the latest version of the plugin, there has been some fixes since then.

Some advantages of using the credential provider rather than your own scripts:

  • your Jenkins jobs consume the credentials with no knowledge of Azure Key Vault, so they stay vendor-independent.

  • the provider integrates with the ecosystem of existing Jenkins credential consumers, such as the Slack Notifications plugin.

  • credential usage is recorded in the central Jenkins credentials tracking log.

  • Jenkins can use multiple credentials providers concurrently, so you can incrementally migrate credentials to Azure Key Vault while consuming other credentials from your existing providers.

Note: Currently only secret text credentials are supported via the credential provider, you can use the configuration-as-code integration to load the secret from Azure Key Vault into the System Credential Provider to work around this limitation.

Getting started

Install the Azure Key Vault plugin

Then you will need to configure the plugin.

Azure authentication

There’s two types of authentication you can use 'Microsoft Azure Service Principal' or 'Managed Identities for Azure Resources'

The easiest one to set this up quickly with is the 'Microsoft Azure Service Principal',

$ az ad sp create-for-rbac --name http://service-principal-name
Creating a role assignment under the scope of "/subscriptions/ff251390-d7c3-4d2f-8352-f9c6f0cc8f3b"
  Retrying role assignment creation: 1/36
  Retrying role assignment creation: 2/36
{
  "appId": "021b5050-9177-4268-a300-7880f2beede3",
  "displayName": "service-principal-name",
  "name": "http://service-principal-name",
  "password": "d9d0d1ba-d16f-4e85-9b48-81ea45a46448",
  "tenant": "7e593e3e-9a1e-4c3d-a26a-b5f71de28463"
}

If this doesn’t work then take a look at the Microsoft documentation for creating a service principal.

Note: for production 'Managed Identities for Azure Resources' is more secure as there’s no password involved and you don’t need to worry about the service principal’s password or certificate expiring.

Vault setup

You need to create a vault and give your service principal access to it:

RESOURCE_GROUP_NAME=my-resource-group
az group create --location uksouth --name $RESOURCE_GROUP_NAME

VAULT=my-vault # you will need a unique name for the vault
az keyvault create --resource-group $RESOURCE_GROUP_NAME --name $VAULT
az keyvault set-policy --resource-group $RESOURCE_GROUP_NAME --name $VAULT \
  --secret-permissions get list --spn http://service-principal-name

Jenkins credential

The next step is to configure the credential in Jenkins:

  1. click 'Credentials'

  2. click 'System' (it’ll appear below the Credentials link in the side bar)

  3. click 'Global credentials (unrestricted)'

  4. click 'Add Credentials'

  5. select 'Microsoft Azure Service Principal'Microsoft Azure Service Principal dropdown

  6. fill out the form from the credential created above, appId is 'Client ID', password is 'Client Secret'Microsoft Azure Service Principal credential configuration

  7. click 'Verify Service Principal', you should see 'Successfully verified the Microsoft Azure Service Principal'.

  8. click 'Save'

Jenkins Azure Key Vault plugin configuration

You now have a credential you can use to interact with Azure resources from Jenkins, now you need to configure the plugin:

  1. go back to the Jenkins home page

  2. click 'Manage Jenkins'

  3. click 'Configure System'

  4. search for 'Azure Key Vault Plugin'

  5. enter your vault url and select your credentialAzure Key Vault plugin configuration

  6. click 'Save'

Store a secret in Azure Key Vault

For the step after this you will need a secret, so let’s create one now:

$ az keyvault secret set --vault-name $YOUR_VAULT --name secret-key --value my-super-secret

Create a pipeline

Install the Pipeline plugin if you don’t already have it.

From the Jenkins home page, click 'New item', and then:

  1. enter a name, i.e. 'key-vault-test'

  2. click on 'Pipeline'

  3. add the following to the pipeline definition:

Jenkinsfile (Declarative Pipeline)
pipeline {
  agent any
  environment {
    SECRET_KEY = credentials('secret-key')
  }
  stages {
    stage('Foo') {
      steps {
        echo SECRET_KEY
        echo SECRET_KEY.substring(0, SECRET_KEY.size() - 1) // shows the right secret was loaded, don't do this for real secrets unless you're debugging
      }
    }
  }
}

You have now successfully retrieved a credential from Azure Key Vault using native Jenkins credentials integration.

configuration-as-code integration

The Configuration as Code plugin has been designed as an opinionated way to configure Jenkins based on human-readable declarative configuration files. Writing such a file should be easy without being a Jenkins expert.

For many secrets the credential provider is enough, but when integrating with other plugins you will likely need more than string credentials.

You can use the configuration-as-code plugin (aka JCasC) to allow integrating with other credential types.

configure authentication

As the JCasC plugin runs during initial startup the Azure Key Vault credential provider needs to be configured before JCasC runs during startup.

The easiest way to do that is via environment variables set before Jenkins starts up:

export AZURE_KEYVAULT_URL=https://my.vault.azure.net
export AZURE_KEYVAULT_SP_CLIENT_ID=...
export AZURE_KEYVAULT_SP_CLIENT_SECRET=...
export AZURE_KEYVAULT_SP_SUBSCRIPTION_ID=...

See the azure-keyvault documentation for other authentication options.

You will now be able to refer to Azure Key Vault secret IDs in your jenkins.yaml file:

credentials:system:domainCredentials:
      - credentials:
        - usernamePassword:
            description: "GitHub"
            id: "jenkins-github"
            password: "${jenkins-github-apikey}"
            scope: GLOBAL
            username: "jenkinsadmin"

Thanks for reading, send feedback on twitter using the tweet button in the top right, any issues or feature requests use GitHub issues.

GitHub App authentication support released

$
0
0

I’m excited to announce support for authenticating as a GitHub app in Jenkins. This has been a long awaited feature by many users.

It has been released in GitHub Branch Source 2.7.0-beta1 which is available in the Jenkins experimental update center.

Authenticating as a GitHub app brings many benefits:

  • Larger rate limits - The rate limit for a GitHub app scales with your organization size, whereas a user based token has a limit of 5000 regardless of how many repositories you have.

  • User-independent authentication - Each GitHub app has its own user-independent authentication. No more need for 'bot' users or figuring out who should be the owner of 2FA or OAuth tokens.

  • Improved security and tighter permissions - GitHub Apps offer much finer-grained permissions compared to a service user and its personal access tokens. This lets the Jenkins GitHub app require a much smaller set of privileges to run properly.

  • Access to GitHub Checks API - GitHub Apps can access the the GitHub Checks API to create check runs and check suites from Jenkins jobs and provide detailed feedback on commits as well as code annotation

Getting started

Install the GitHub Branch Source plugin, make sure the version is at least 2.7.0-beta1. Installation guidelines for beta releases are available here

Configuring the GitHub Organization Folder

Follow the GitHub App Authentication setup guide. These instructions are also linked from the plugin’s README on GitHub.

Once you’ve finished setting it up, Jenkins will validate your credential and you should see your new rate limit. Here’s an example on a large org:

GitHub app rate limit

How do I get an API token in my pipeline?

In addition to usage of GitHub App authentication for Multi-Branch Pipeline, you can also use app authentication directly in your Pipelines. You can access the Bearer token for the GitHub API by just loading a 'Username/Password' credential as usual, the plugin will handle authenticating with GitHub in the background.

This could be used to call additional GitHub API endpoints from your pipeline, possibly thedeployments api or you may wish to implement your ownchecks api integration until Jenkins supports this out of the box.

Note: the API token you get will only be valid for one hour, don’t get it at the start of the pipeline and assume it will be valid all the way through

Example: Let’s submit a check run to Jenkins from our Pipeline:

pipeline {
  agent any

  stages{
    stage('Check run') {
      steps {
        withCredentials([usernamePassword(credentialsId: 'githubapp-jenkins',usernameVariable: 'GITHUB_APP',passwordVariable: 'GITHUB_JWT_TOKEN')]) {
            sh '''
            curl -H "Content-Type: application/json" \                 -H "Accept: application/vnd.github.antiope-preview+json" \                 -H "authorization: Bearer ${GITHUB_JWT_TOKEN}" \                 -d '{ "name": "check_run", \                       "head_sha": "'${GIT_COMMIT}'", \                       "status": "in_progress", \                       "external_id": "42", \                       "started_at": "2020-03-05T11:14:52Z", \                       "output": { "title": "Check run from Jenkins!", \                                   "summary": "This is a check run which has been generated from Jenkins as GitHub App", \                                   "text": "...and that is awesome"}}' https://api.github.com/repos/<org>/<repo>/check-runs'''
        }
      }
    }
  }
}

What’s next

GitHub Apps authentication in Jenkins is a huge improvement. Many teams have already started using it and have helped improve it by giving pre-release feedback. There are more improvements on the way.

There’s a proposed Google Summer of Code project: GitHub Checks API for Jenkins Plugins. It will look at integrating with the Checks API, with a focus on reporting issues found using the warnings-ng plugin directly onto the GitHub pull requests, along with test results summary on GitHub. Hopefully it will make the Pipeline example below much simpler for Jenkins users :) If you want to get involved with this, join the GSoC Gitter channel and ask how you can help.

Viewing all 1087 articles
Browse latest View live